


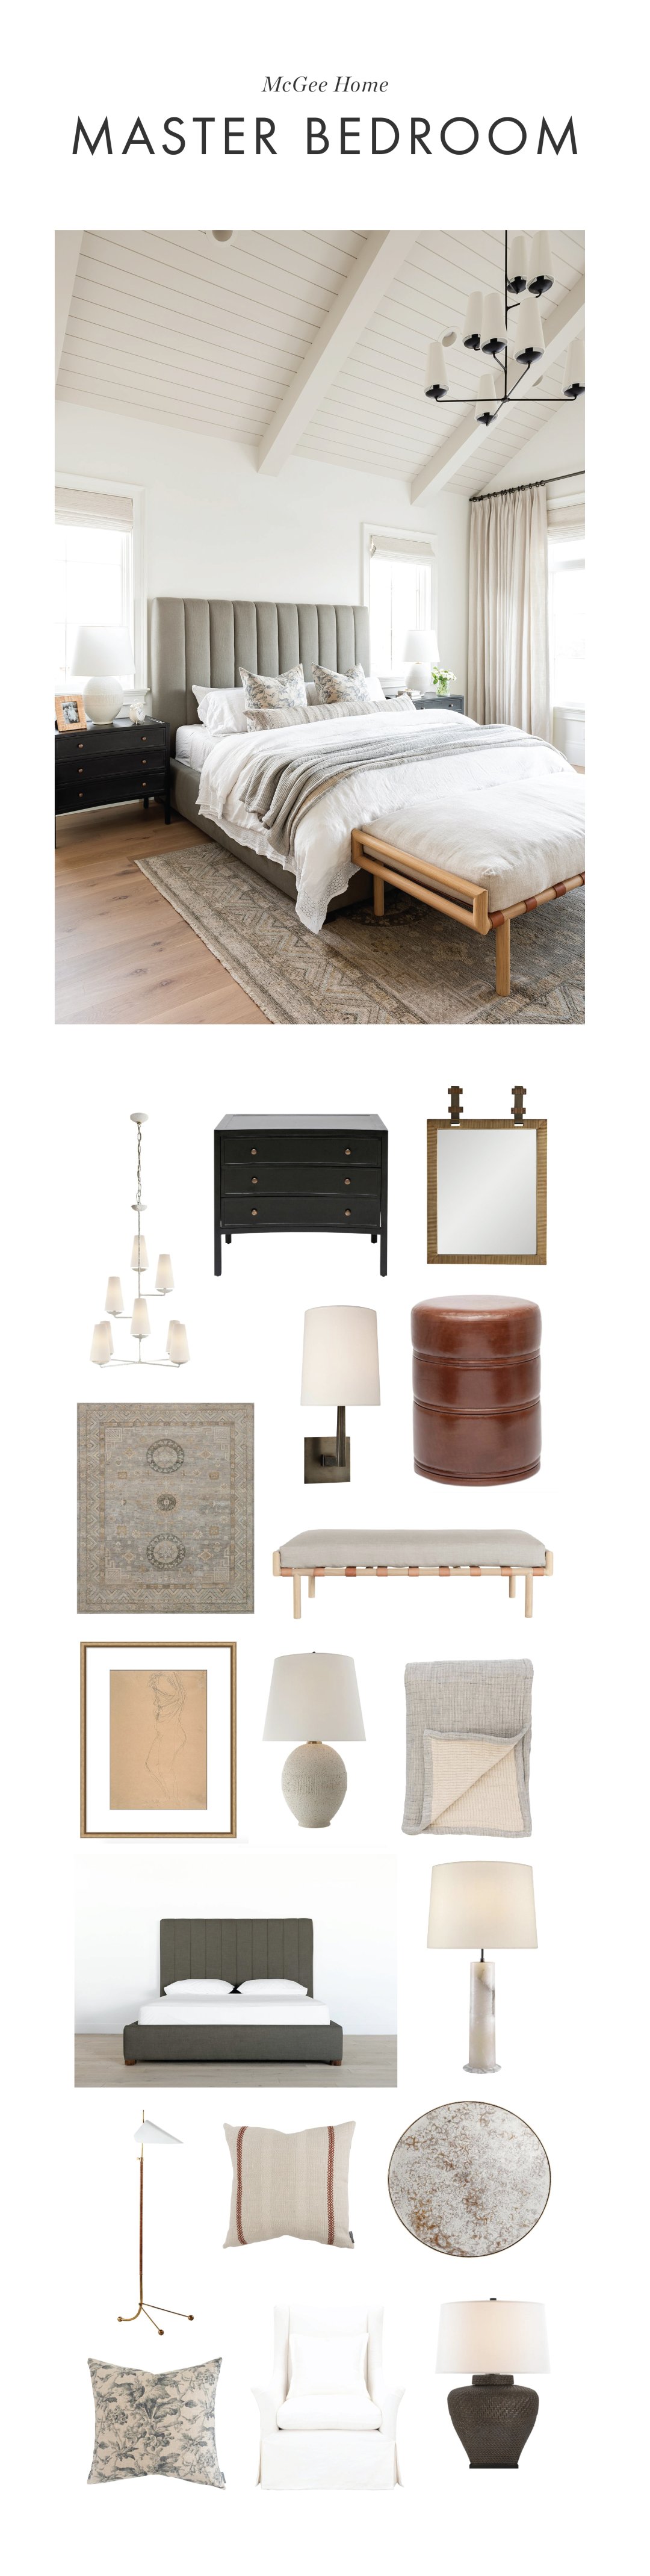
The McGee Home: Master Bedroom Photo Tour
A look into the process of designing our master
07 May 2020 -
Today, we’re excited to show you around The McGee Home master bedroom and talk about all of the details in this space!
We’re so grateful to our sponsors at The Shade Store for partnering with us on all the window treatments throughout our home, including this space.
We’ve said it before, and we’ll say it again, but we are firm believers that master bedrooms should never be an afterthought, and in The McGee Home, we really wanted to make this space feel both relaxing and special. Here’s a look into the process of how we mixed our styles to create our own little sanctuary:
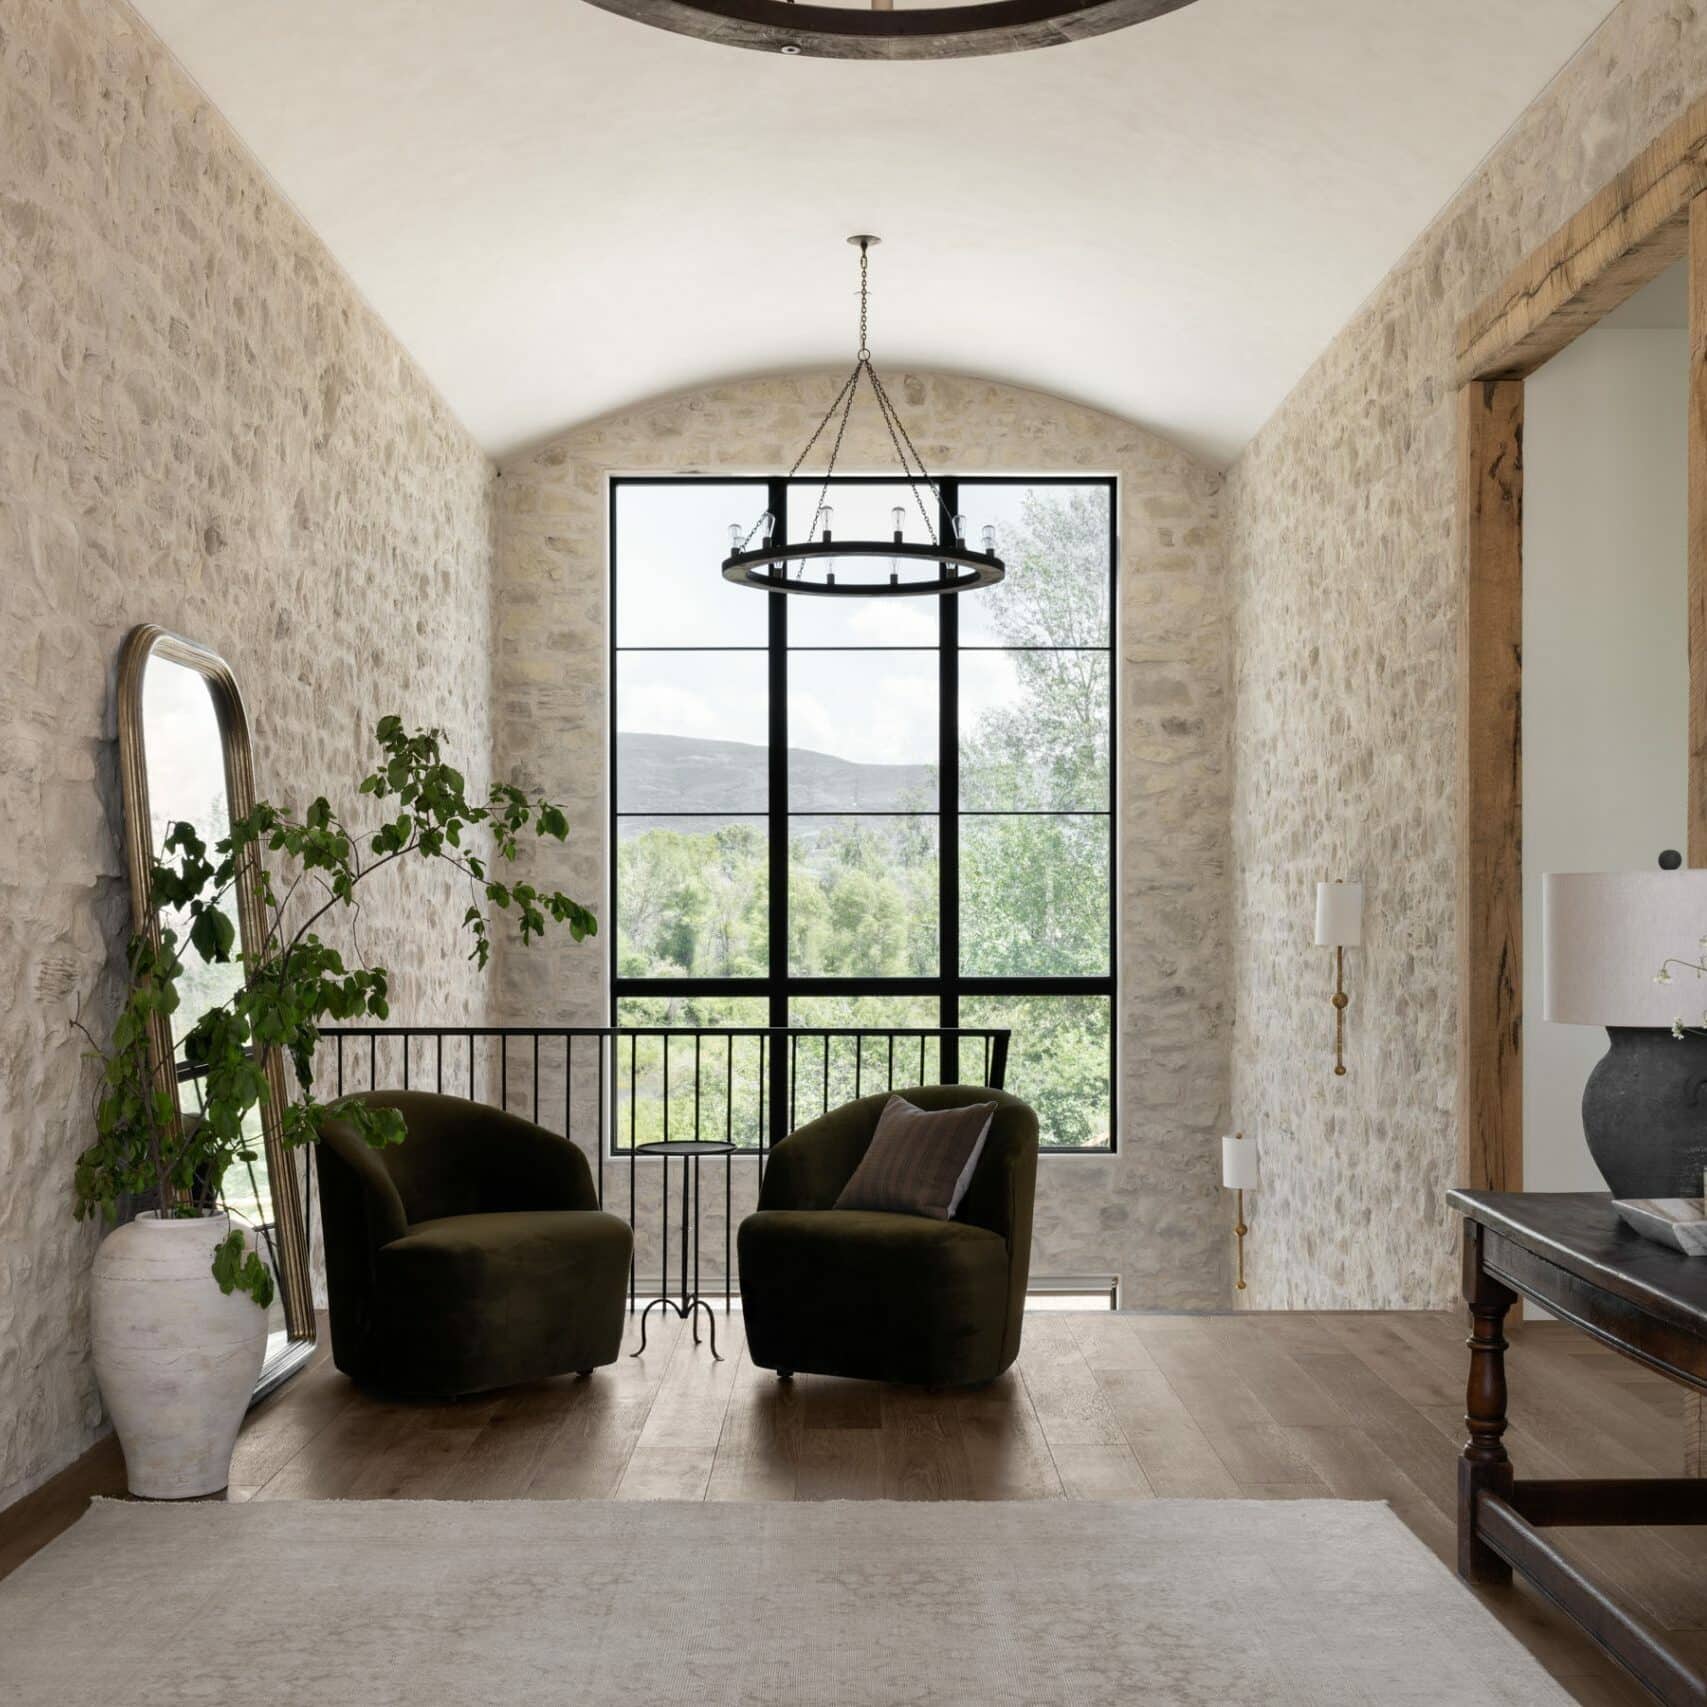
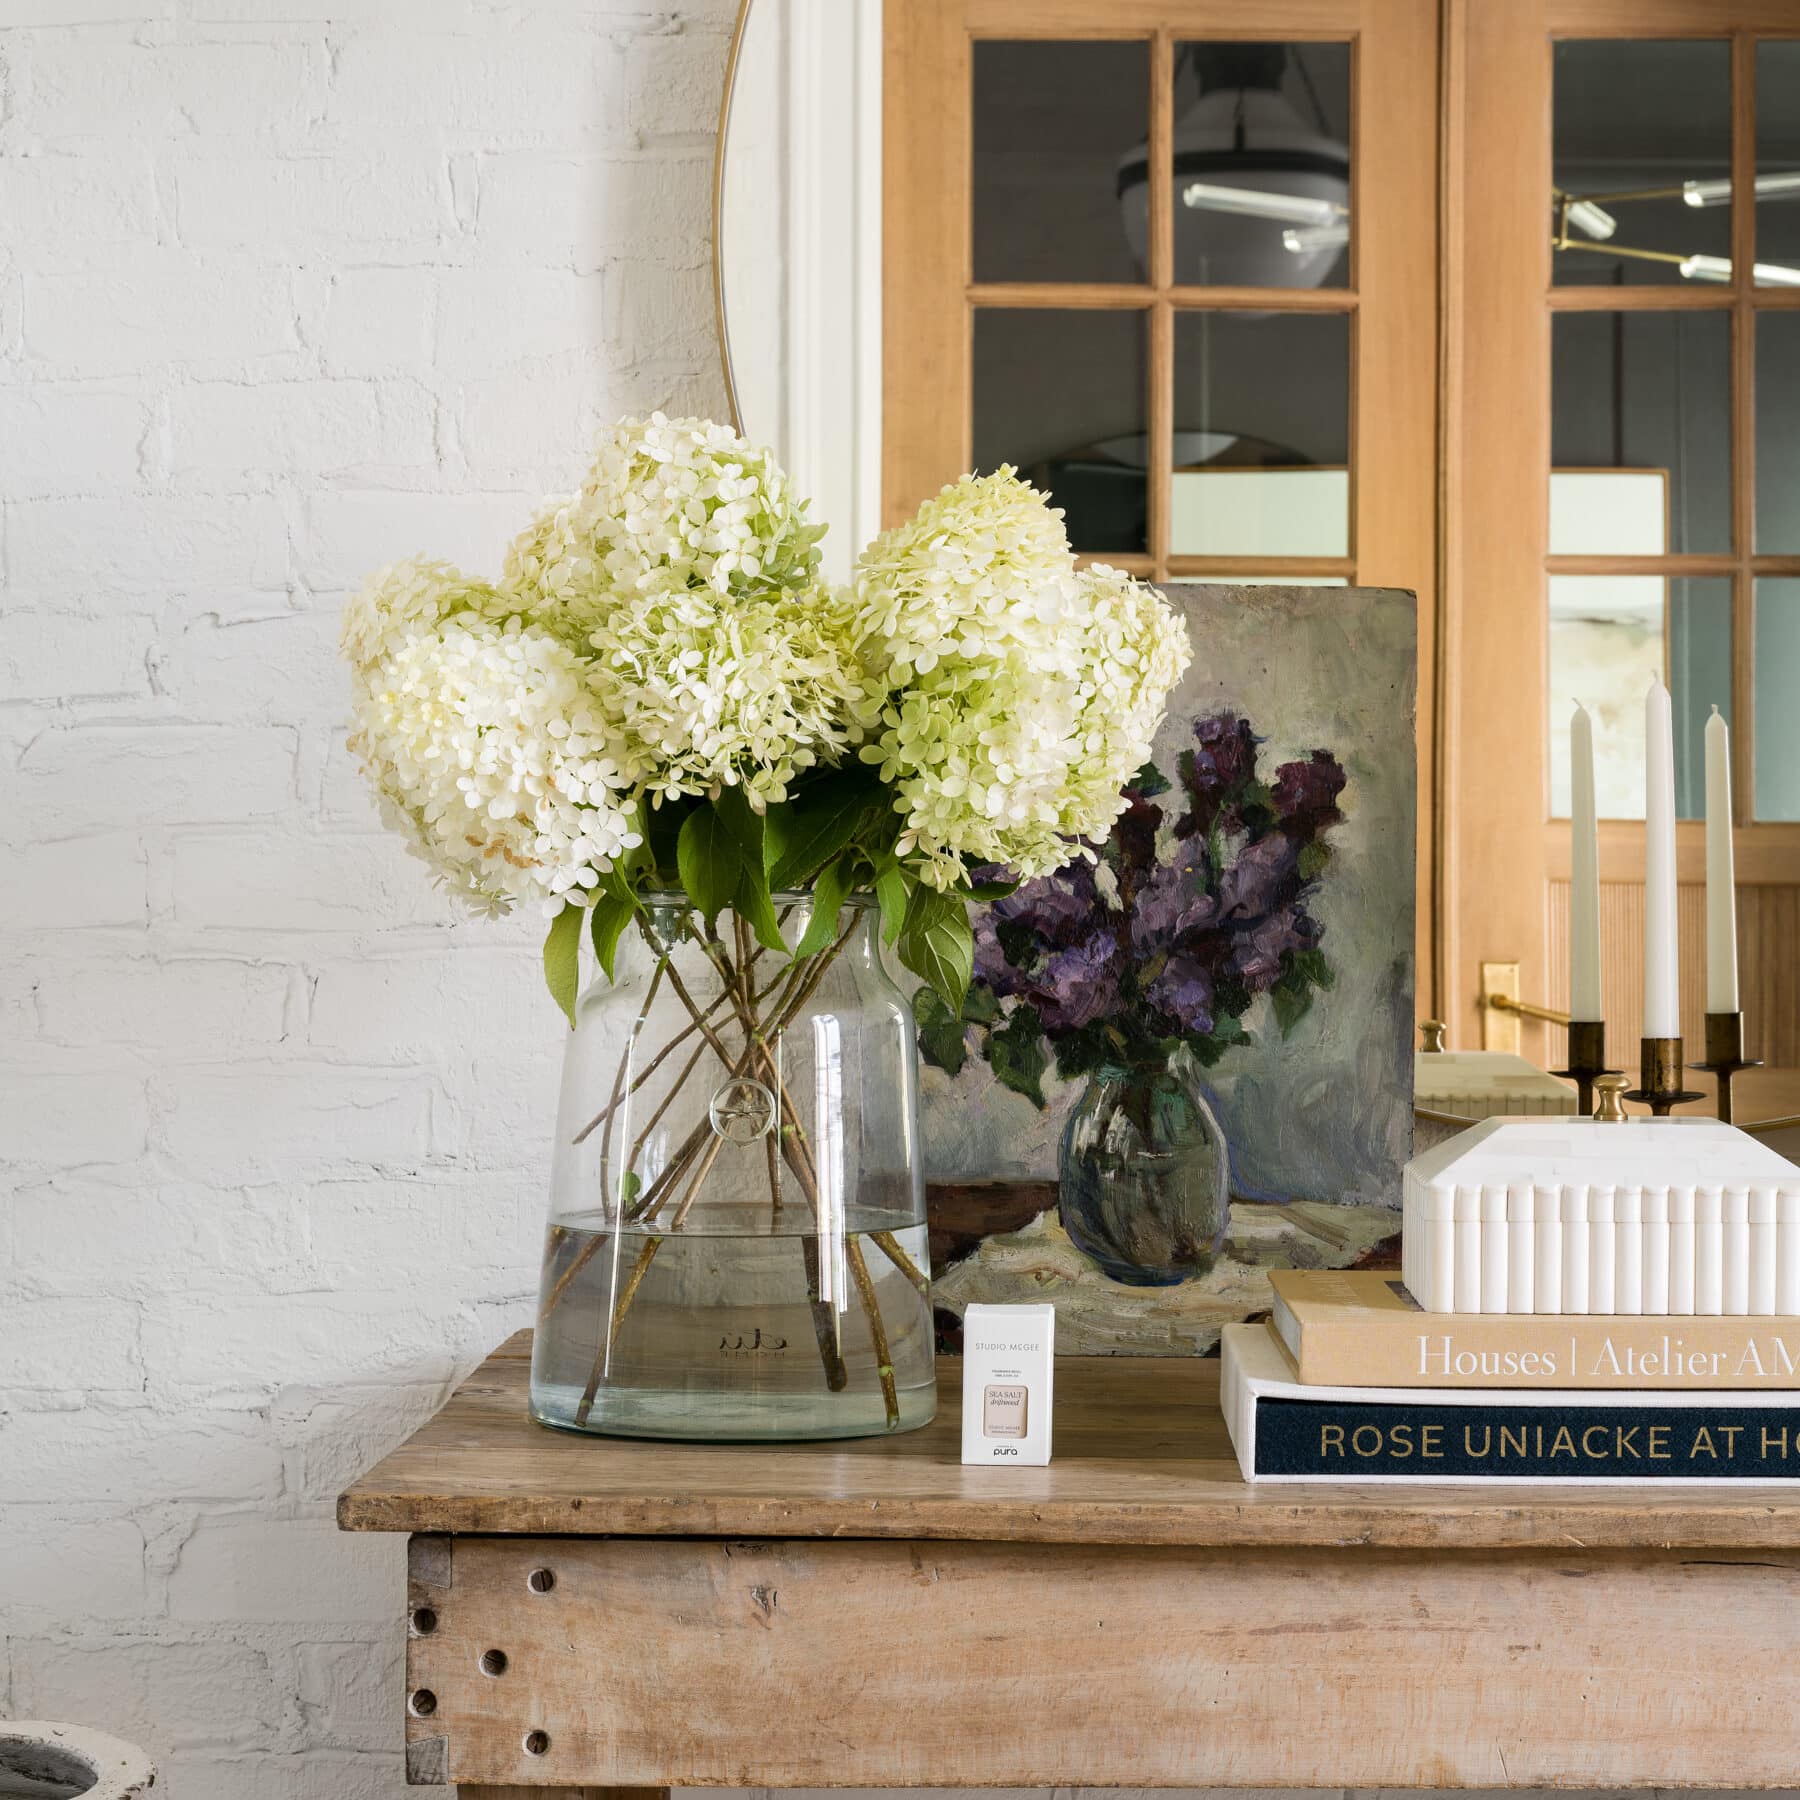
The Vestibule

When you walk into the space, you enter the vestibule where we did this beautiful reeded detail. Our contractor Tyler with Killowen Construction, hand-cut every single one of these pieces from Metrie to lay this molding that I dreamed of and made my vision come to life.
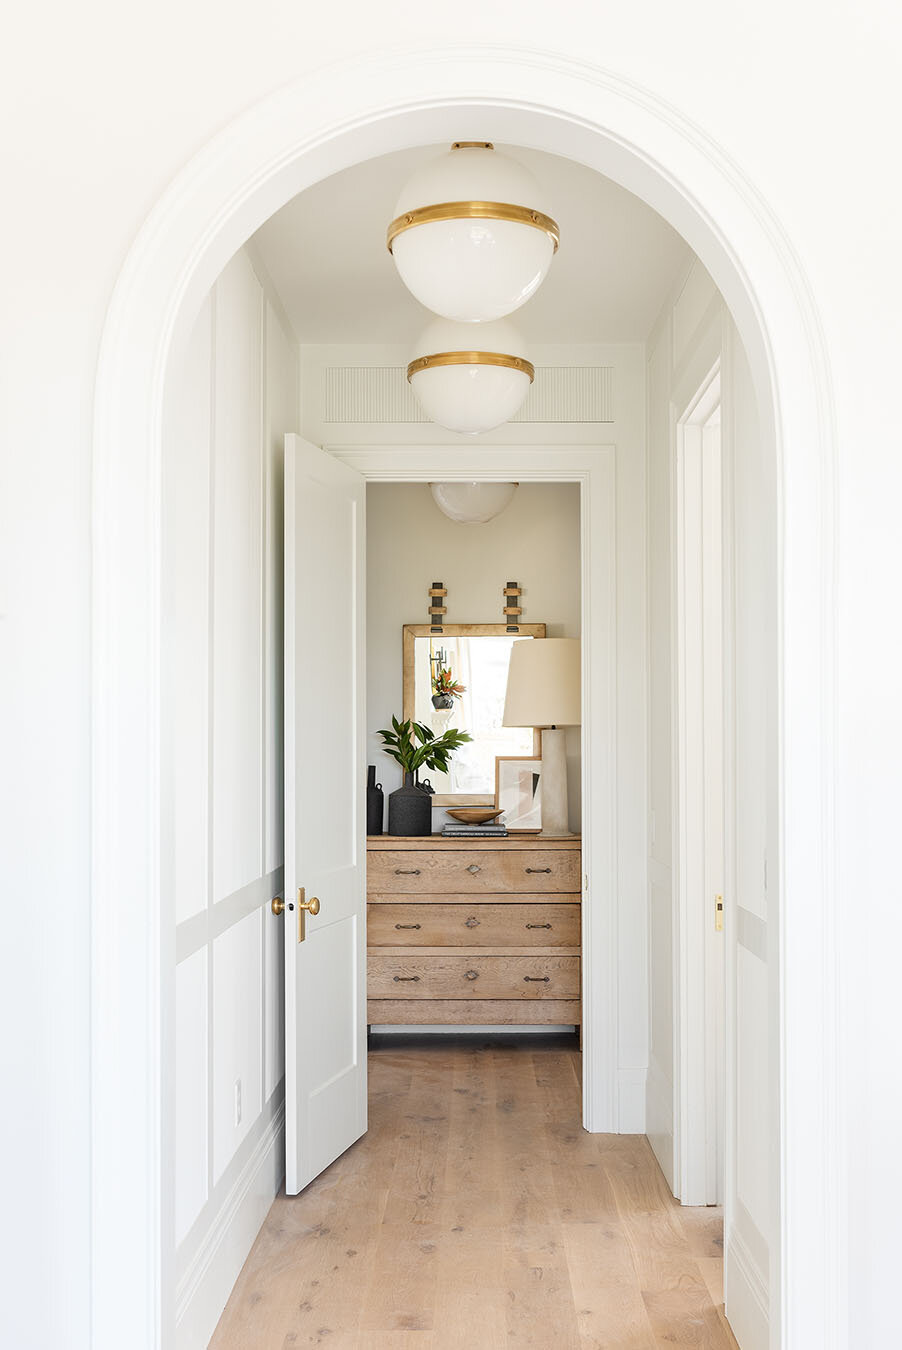
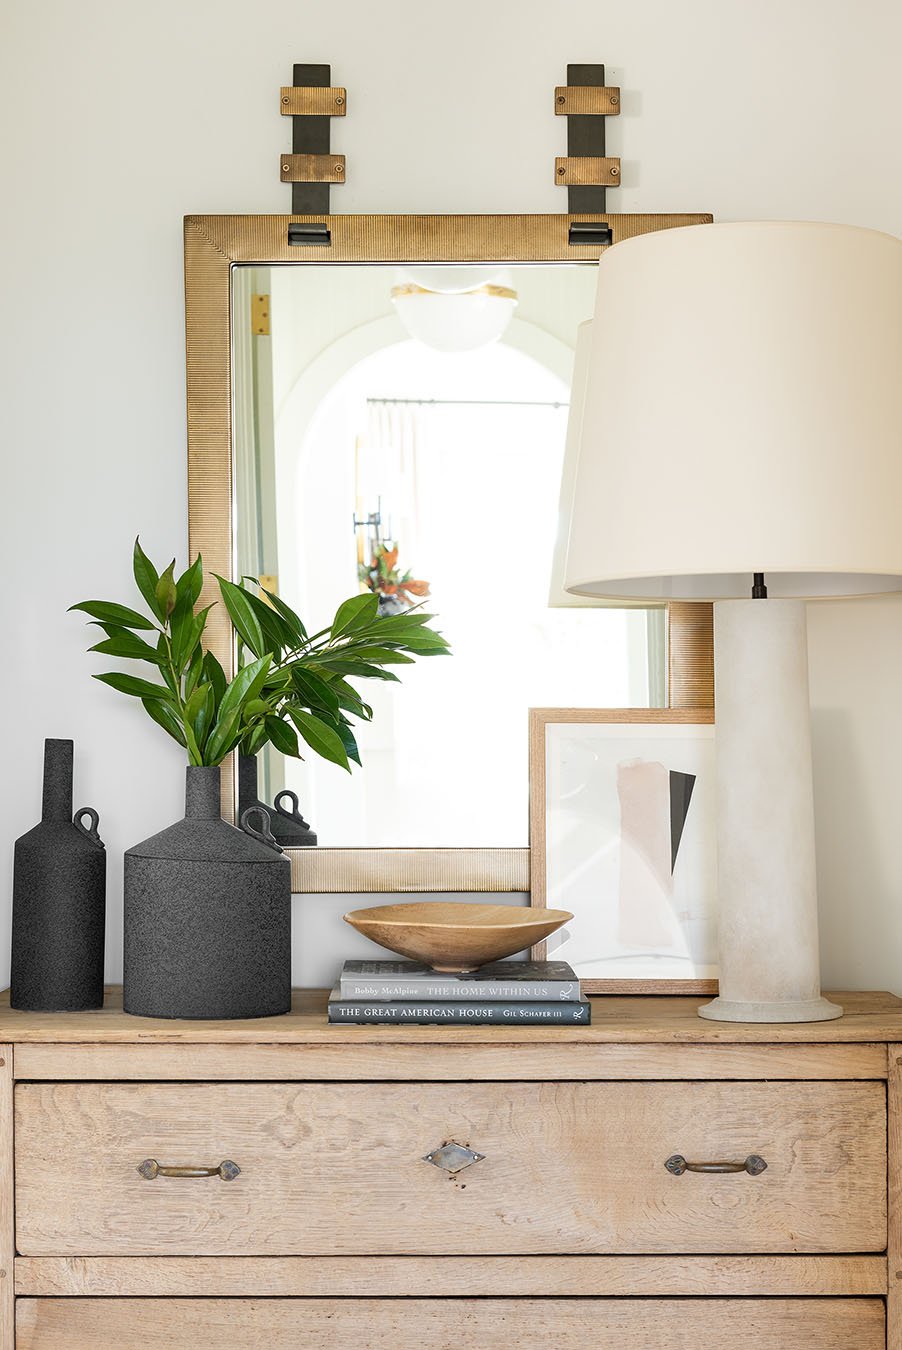
We created this little vignette in the corner that you can see from the inside of our bedroom with a vintage console table, a detailed mirror, and some of our favorite accessories from McGee & Co.
The McGee Home: Master Bedroom Photo Tour
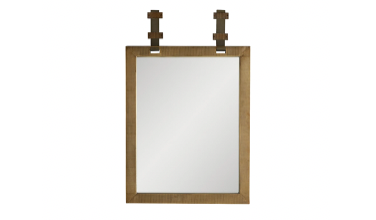
Belmont Mirror

Shape Study I

Metropolitan Vase

Faux Laurel Leaf Stem
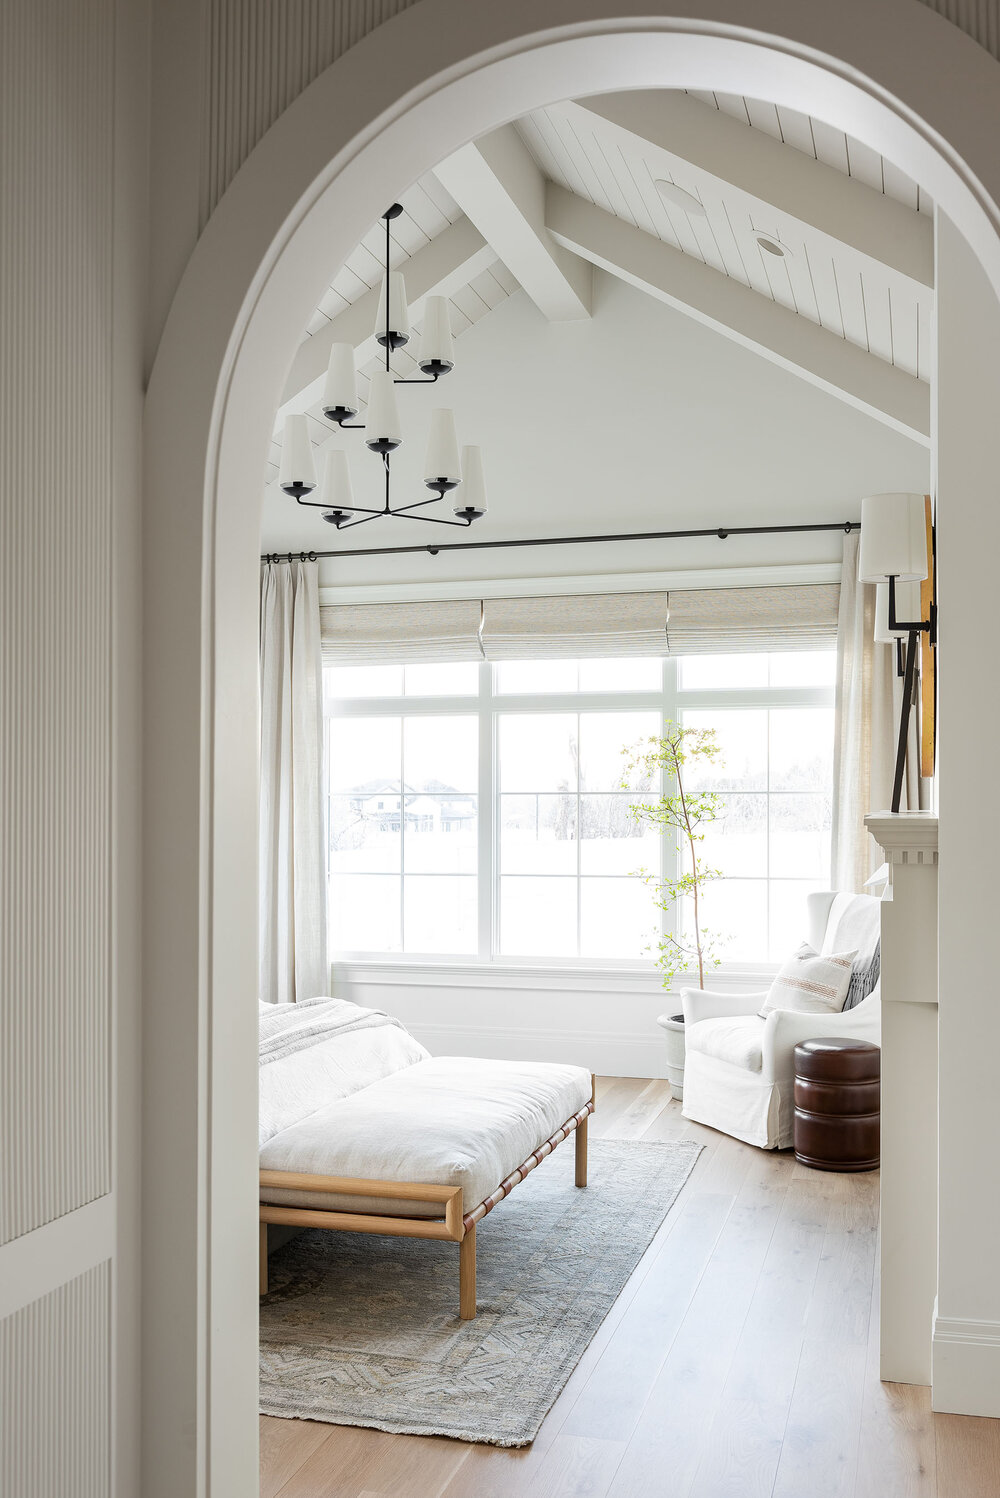
I love that the texture in this entrance has a moody effect, which contrasts with the natural light from the windows that brightens up the space in our master bedroom.
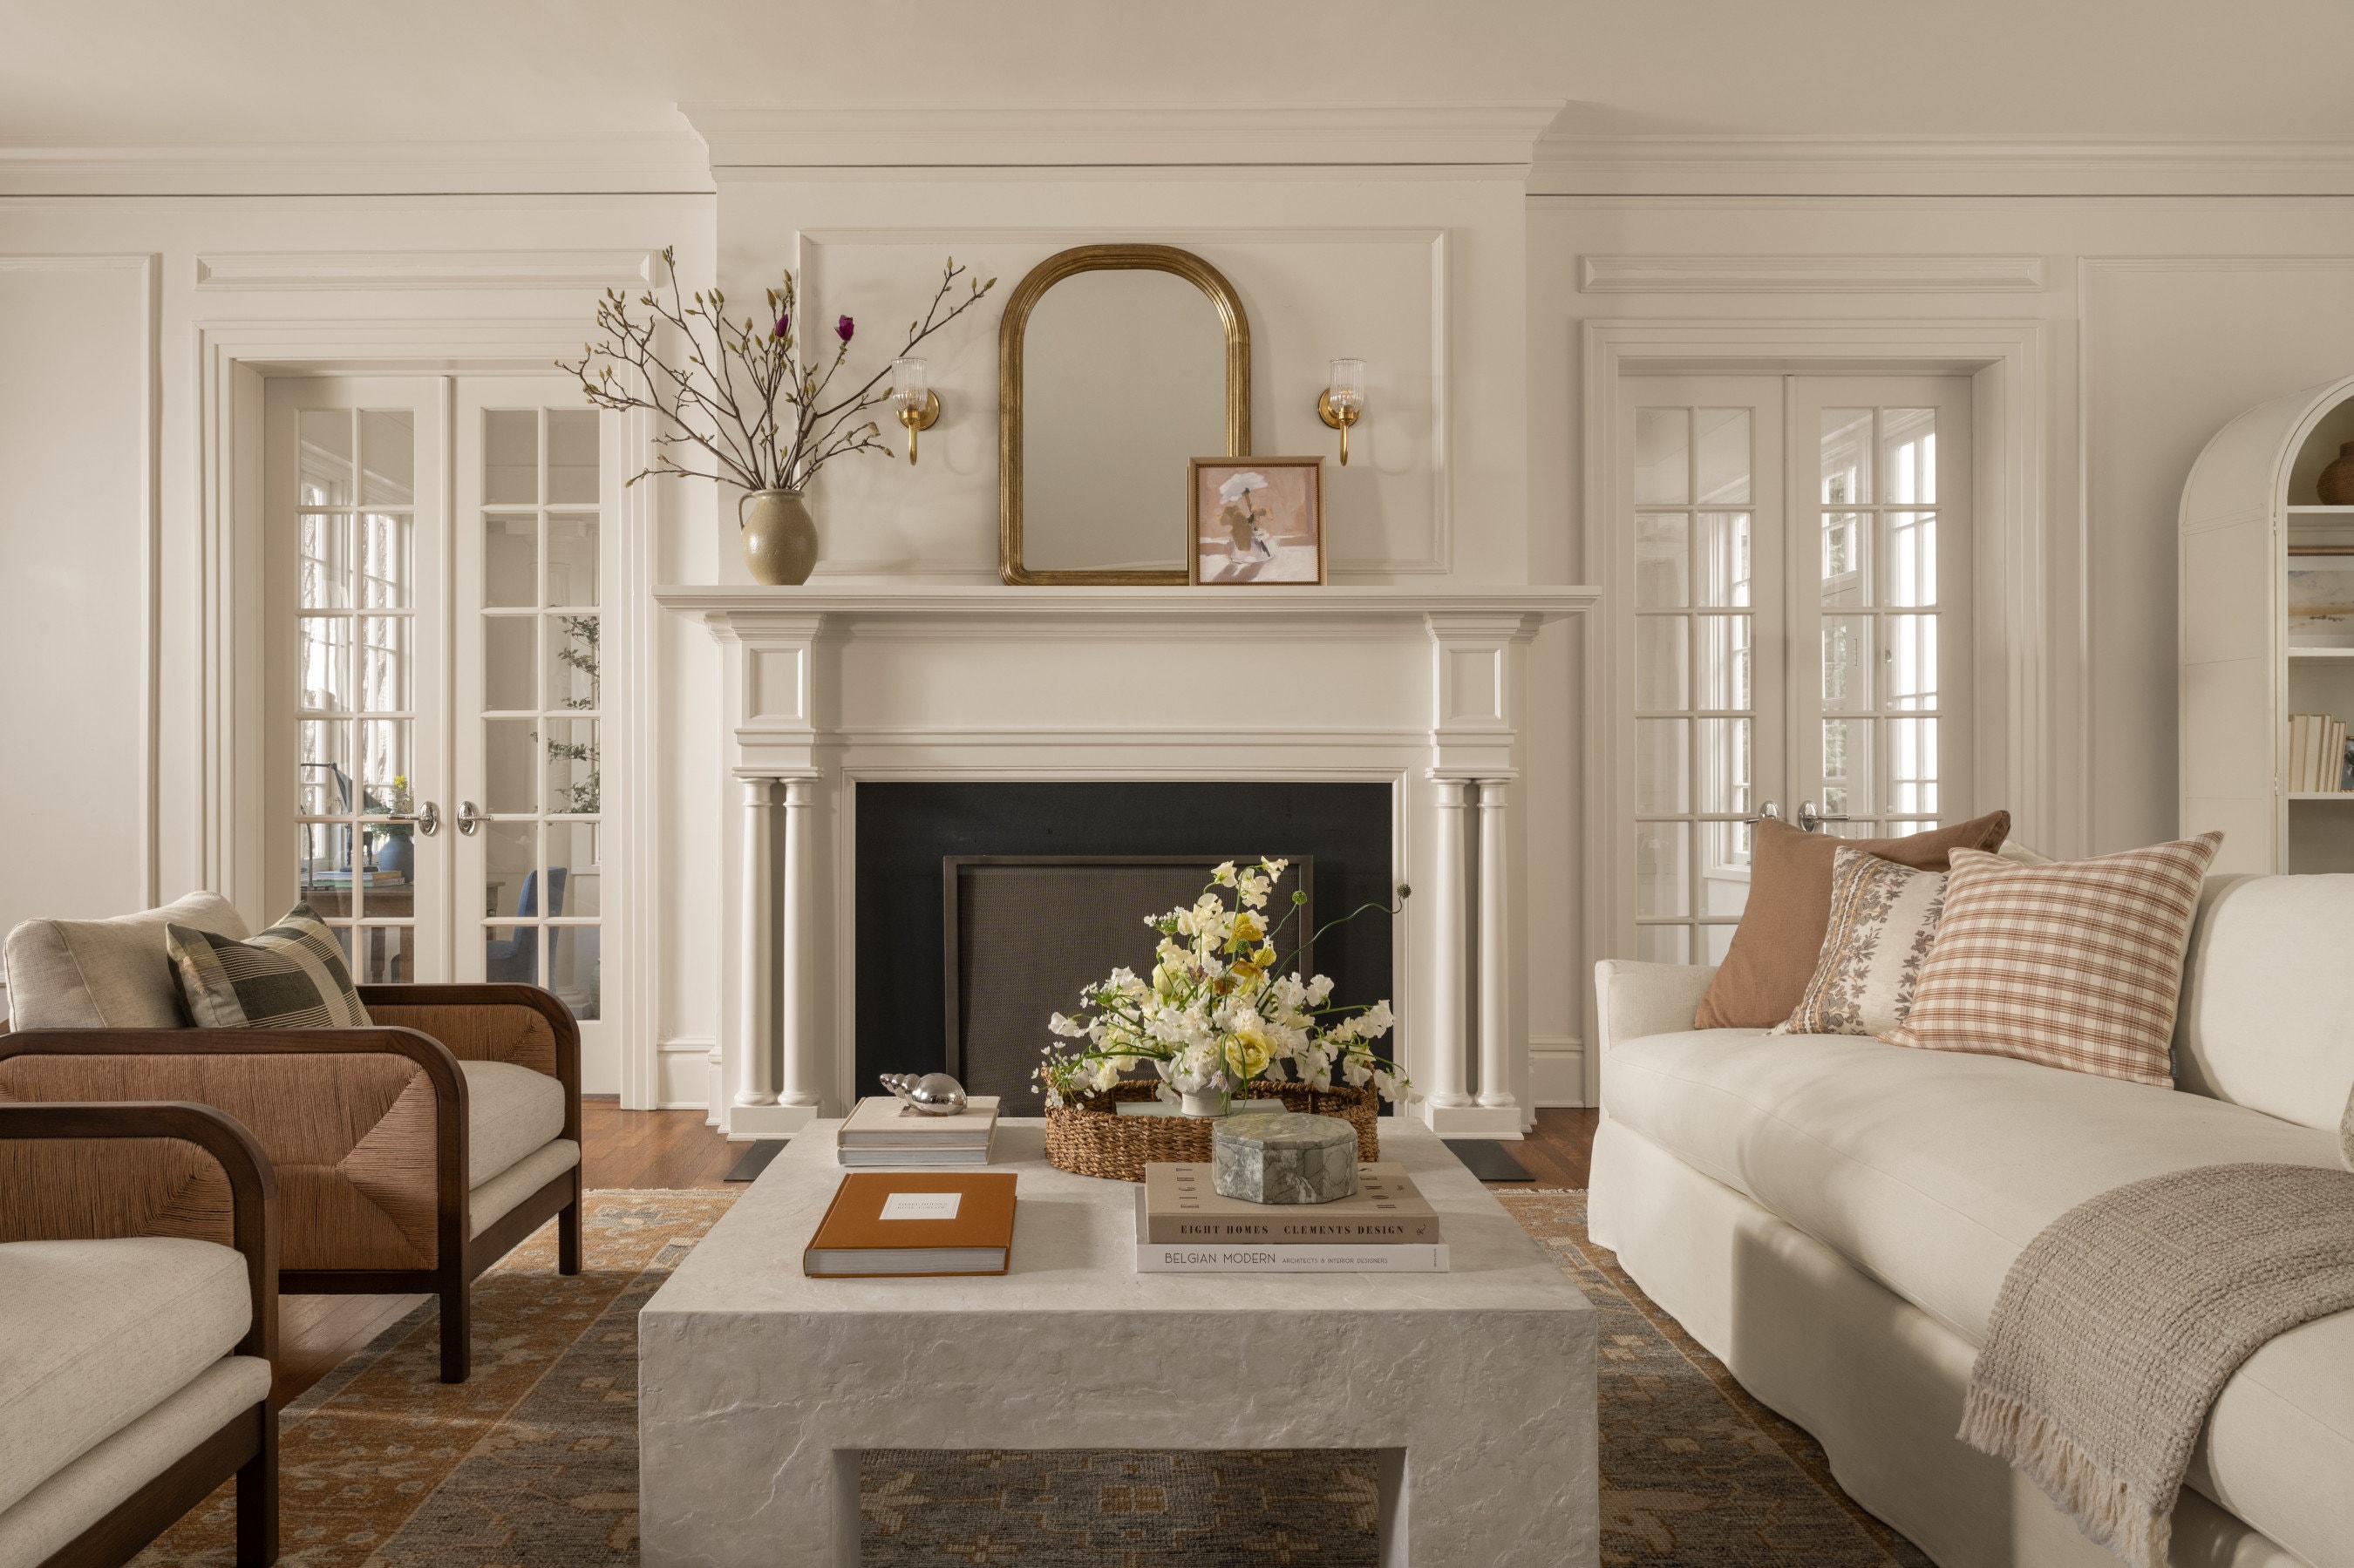
The finishes

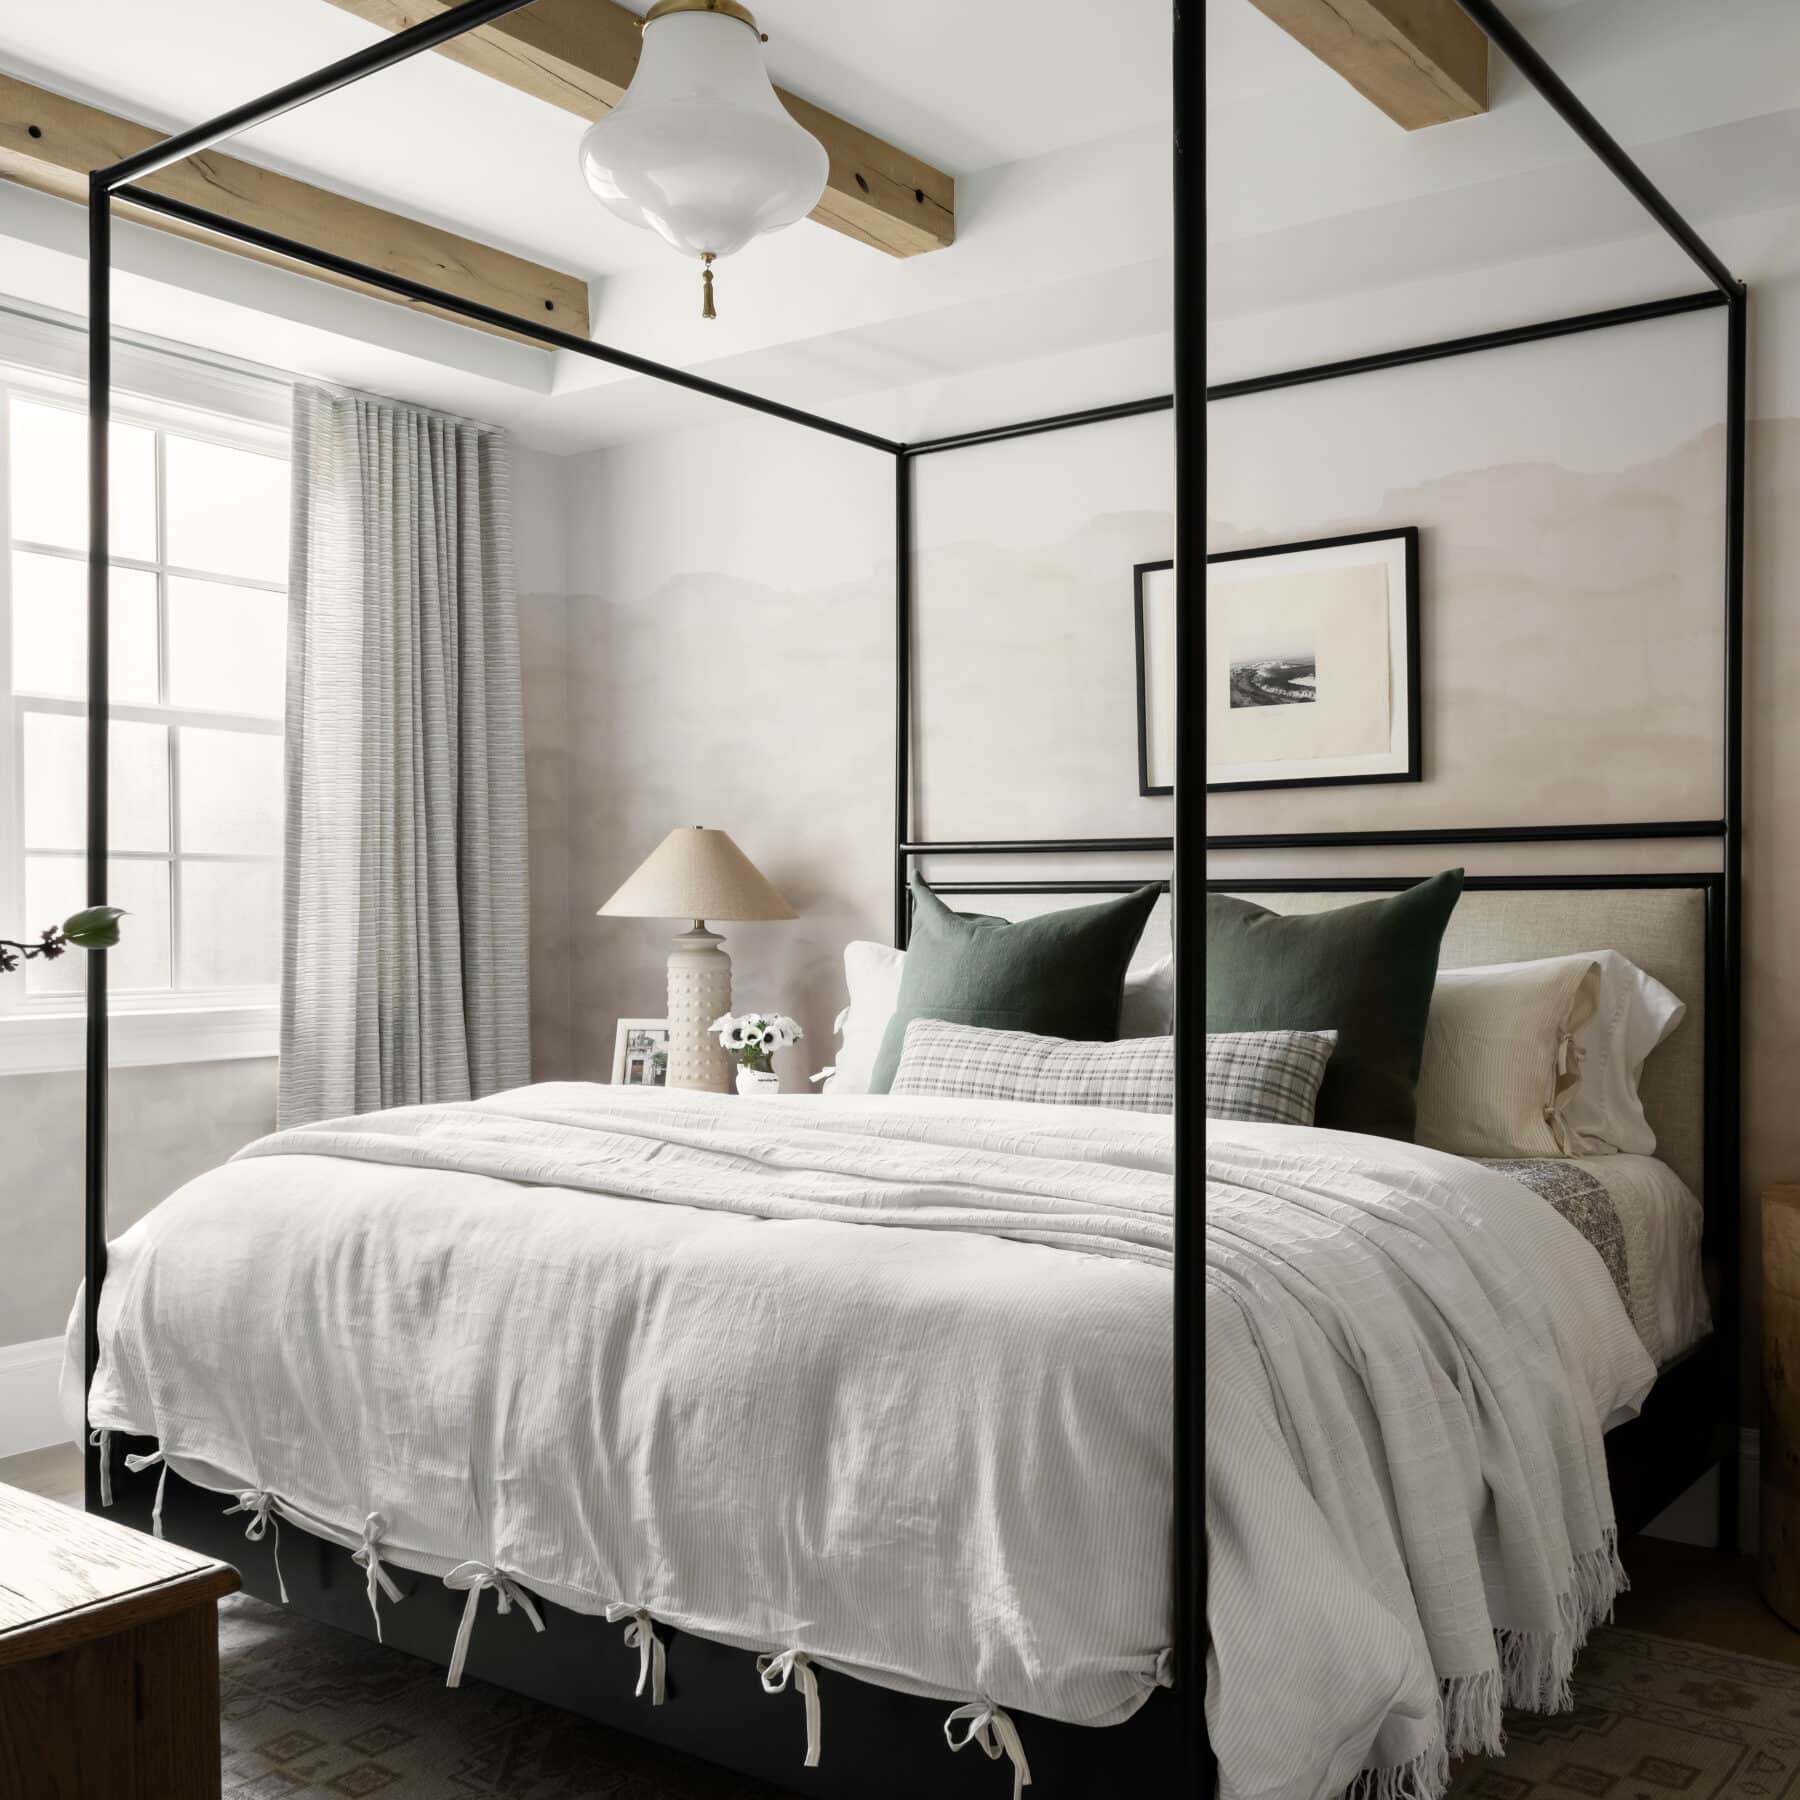
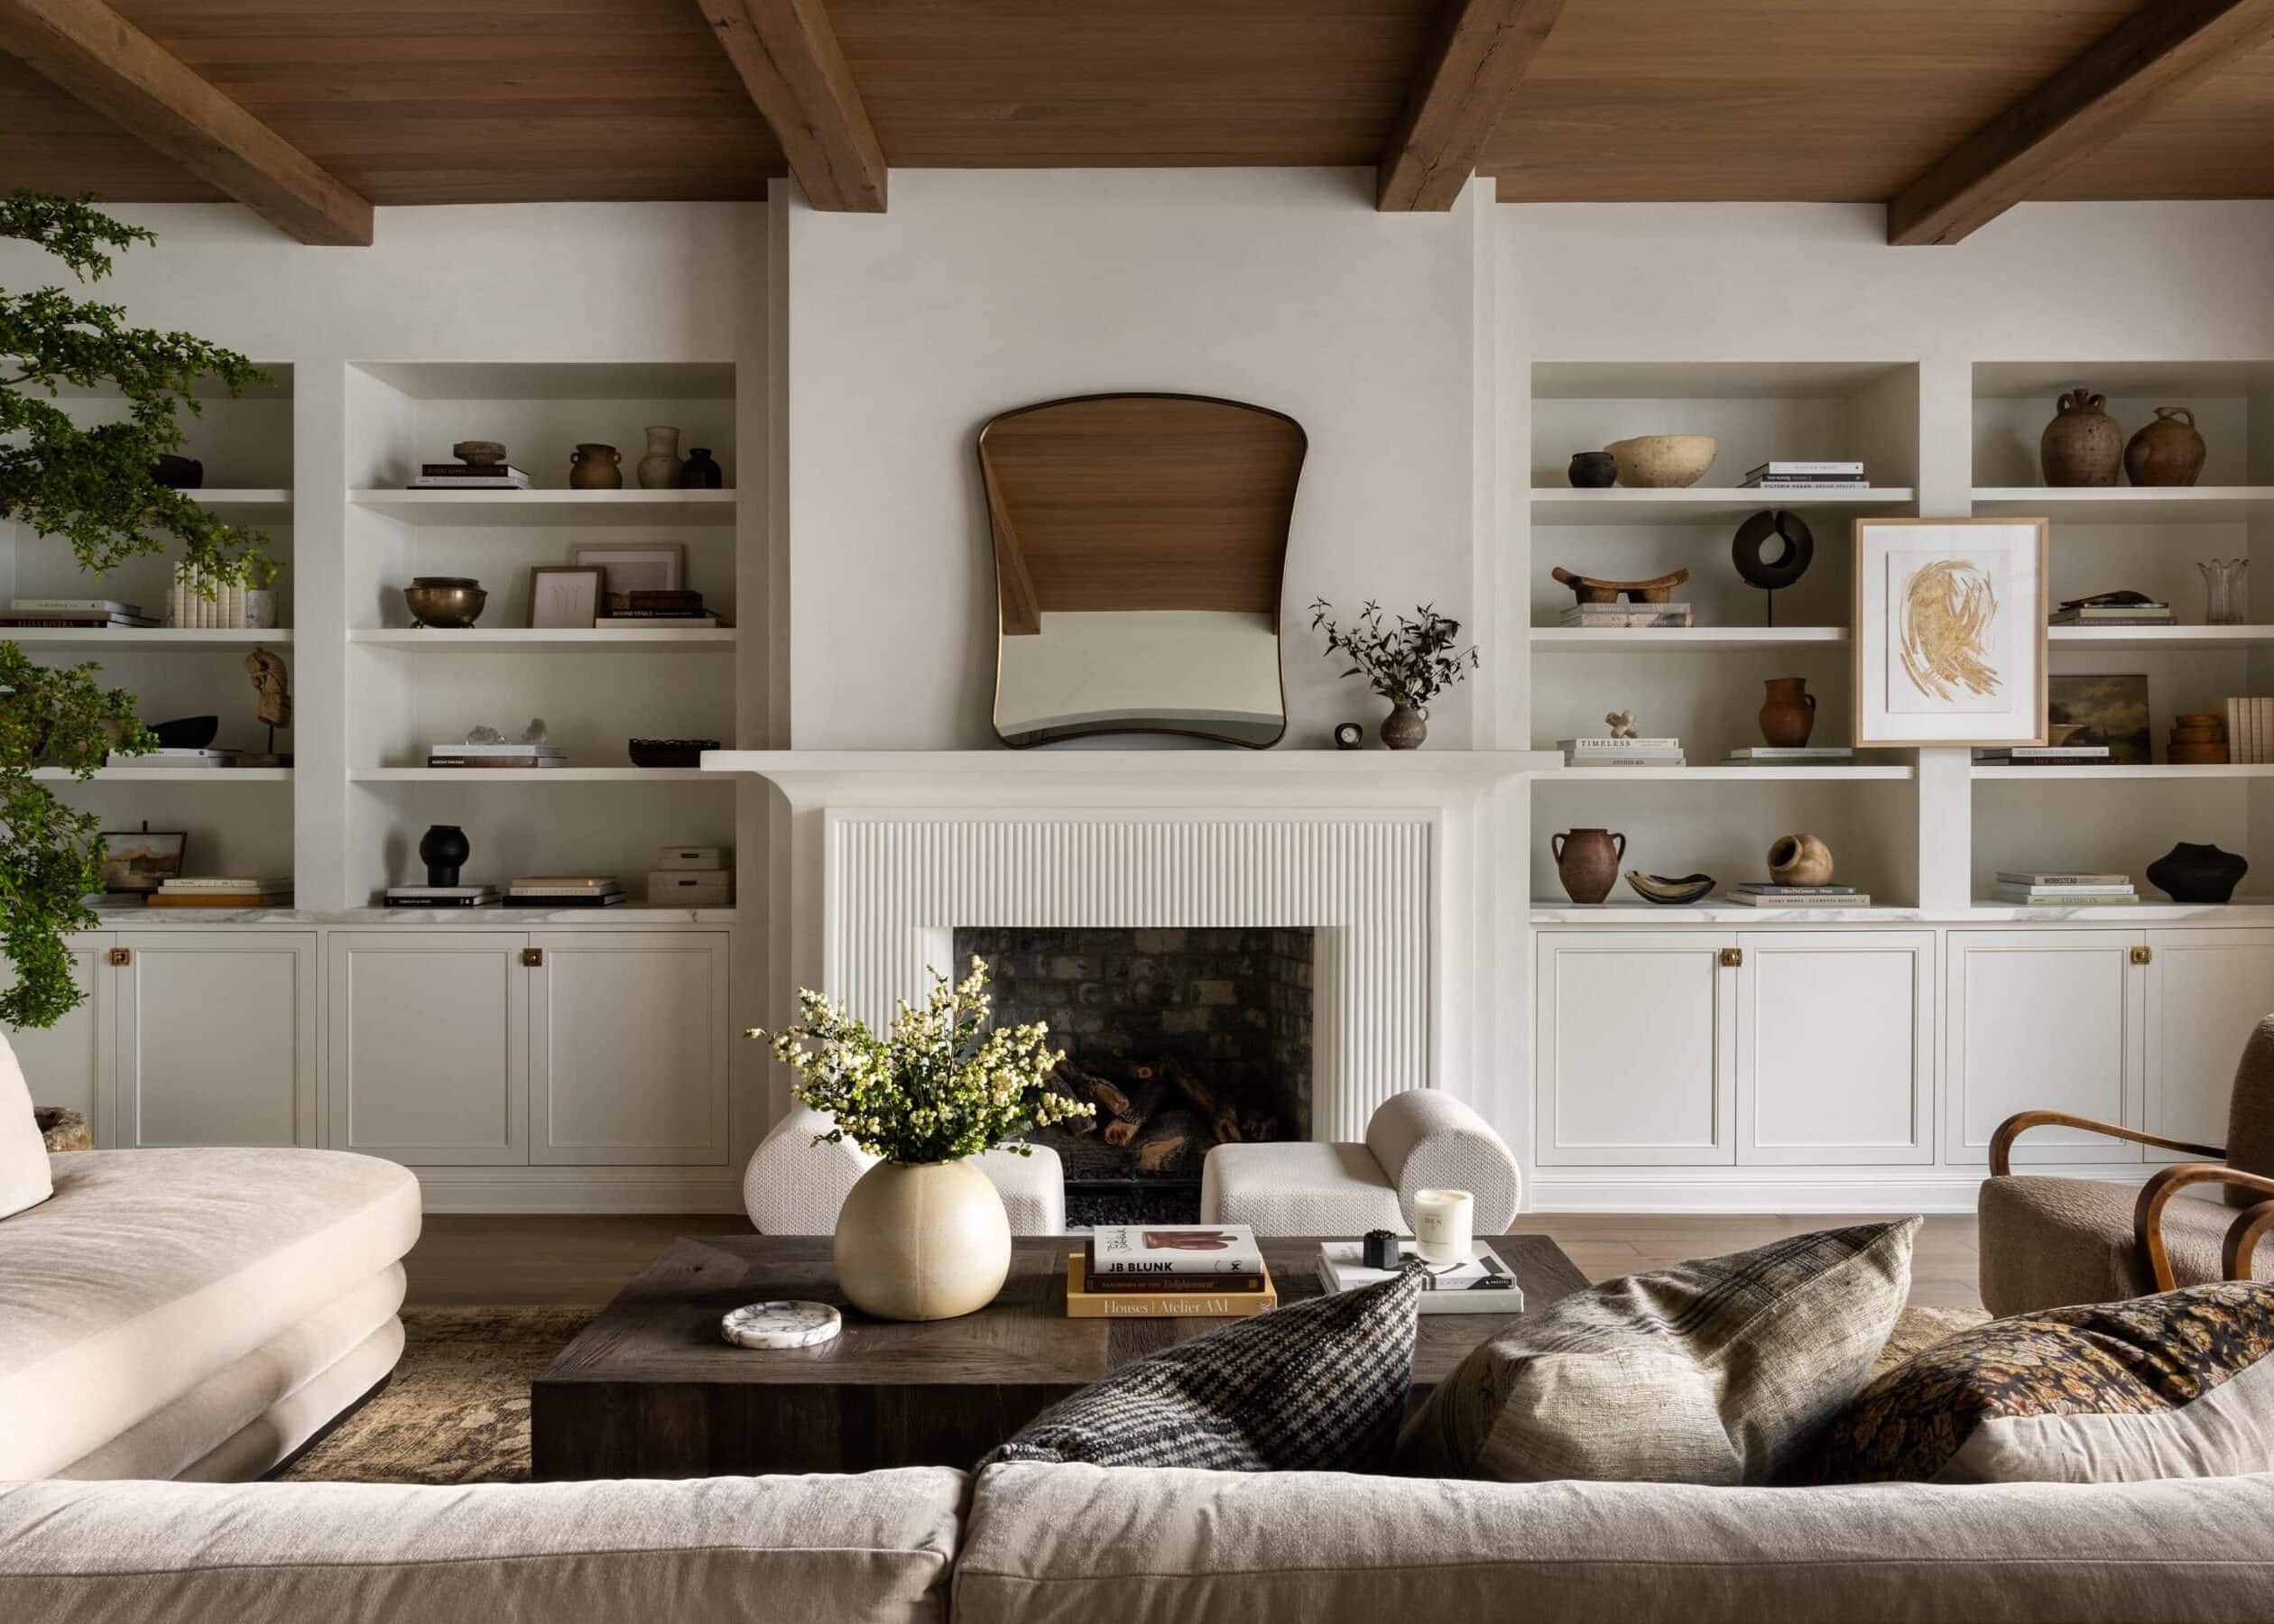
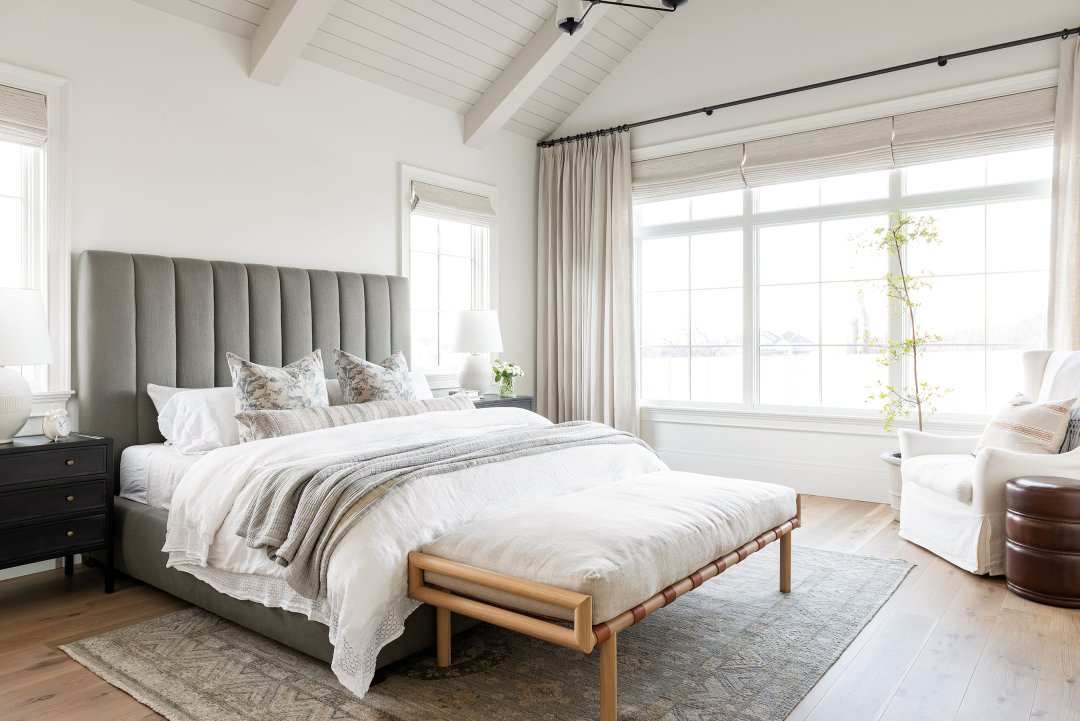
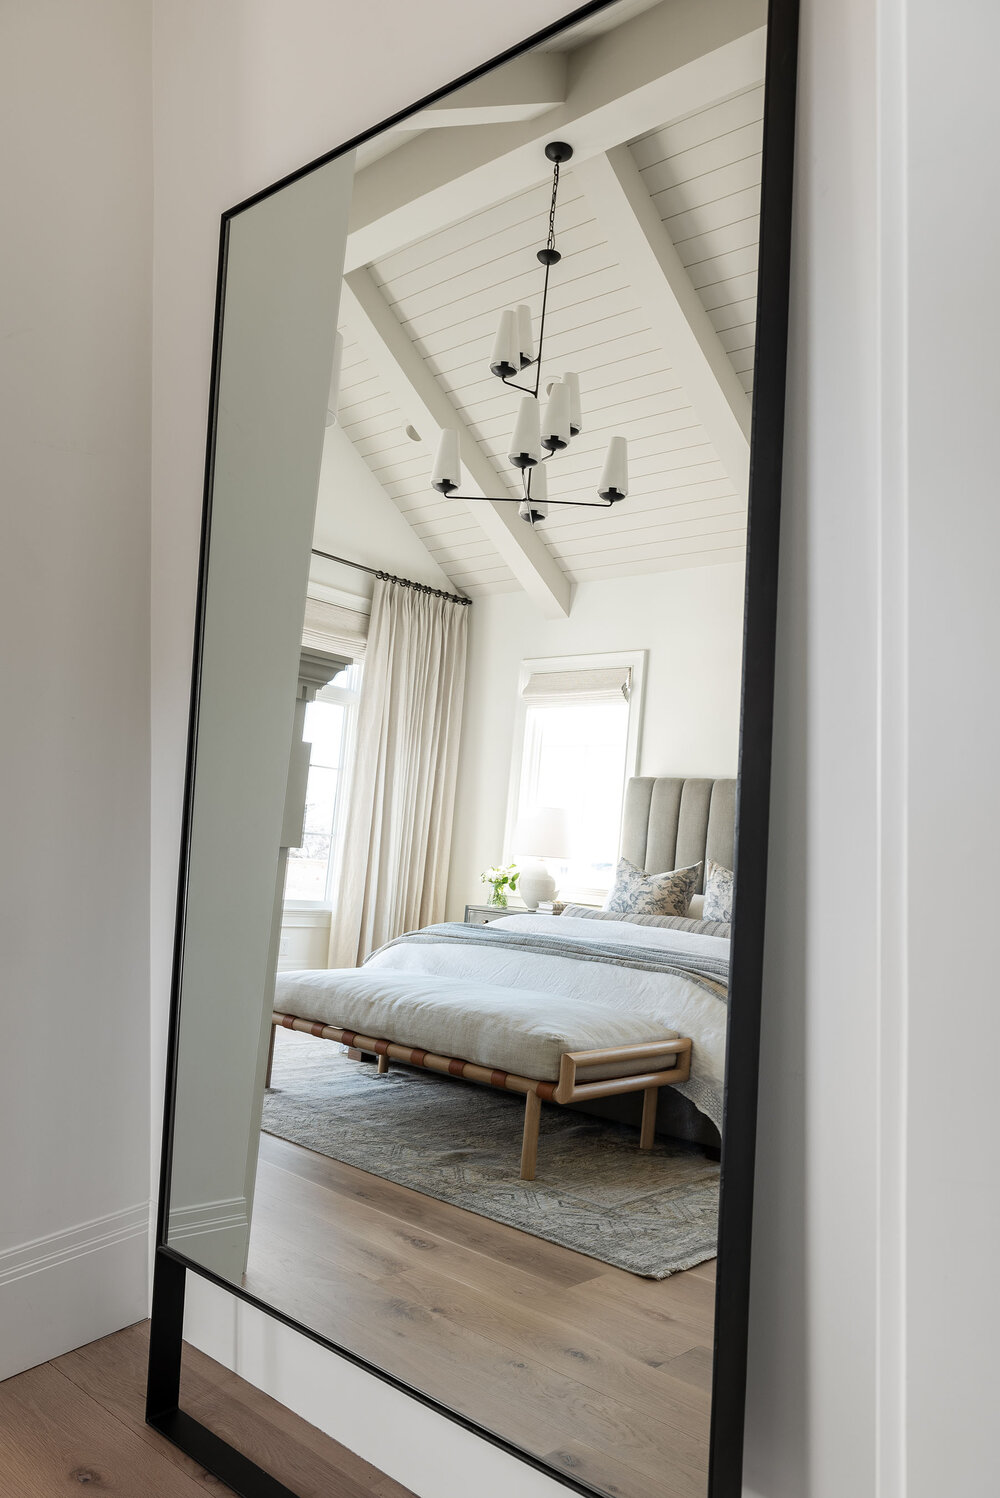
The two things I was most excited about in this room were probably the vaulted ceilings and having a fireplace. I really wanted to draw attention to the ceilings and draw your eye up, so we worked with Metrie to incorporate a shiplap with a beam detail that added some extra emphasis to our chandelier.
We have always been lovers of white paint, but we wanted to do something a bit different here. To do this, we painted our ceiling a darker color than our walls. Usually, it’s the reverse where we’ll go light on the ceiling and darker on the walls, but here we chose Swiss Coffee at 75% and then Natural Cream by Benjamin Moore on the ceilings. I did both in a matte finish so that it doesn’t have a sheen to it, and then tied that color into our fireplace.

I wanted our fireplace to have a traditional old-world feel, so we did this molding detail and added a bump in the center to give it some extra interest and dimensions. Then, we used a remnant from our kitchen countertops and used that on the surround.
The Window Treatments
We partnered with The Shade Store on our window treatments throughout the entire home. They are hand-crafted in the US and the best quality. Custom window treatments make all the difference in a project, from the pleats to the way they hang, and they add a really great layer of texture to a room. When you have shades blinds and drapery custom made to get the measurements of your windows just right, the results are so much better than what you might get with a premade product.

I love to use a woven shade as the foundation for window treatments, especially because you can pick the level of privacy. In all of our bedrooms, we do a blackout liner and motorized shades so you can just wake up and push a button. In this room, we chose the color “Dune,” on our woven shades.
In a few of our spaces, we did an additional layer. Here we did these beautiful drapes in Luxe Linen in their “Oyster,” color, and they have a great, thick lining. We do not have working drapes. These are for looks, but they have an extra fullness to them, so they still look high end.
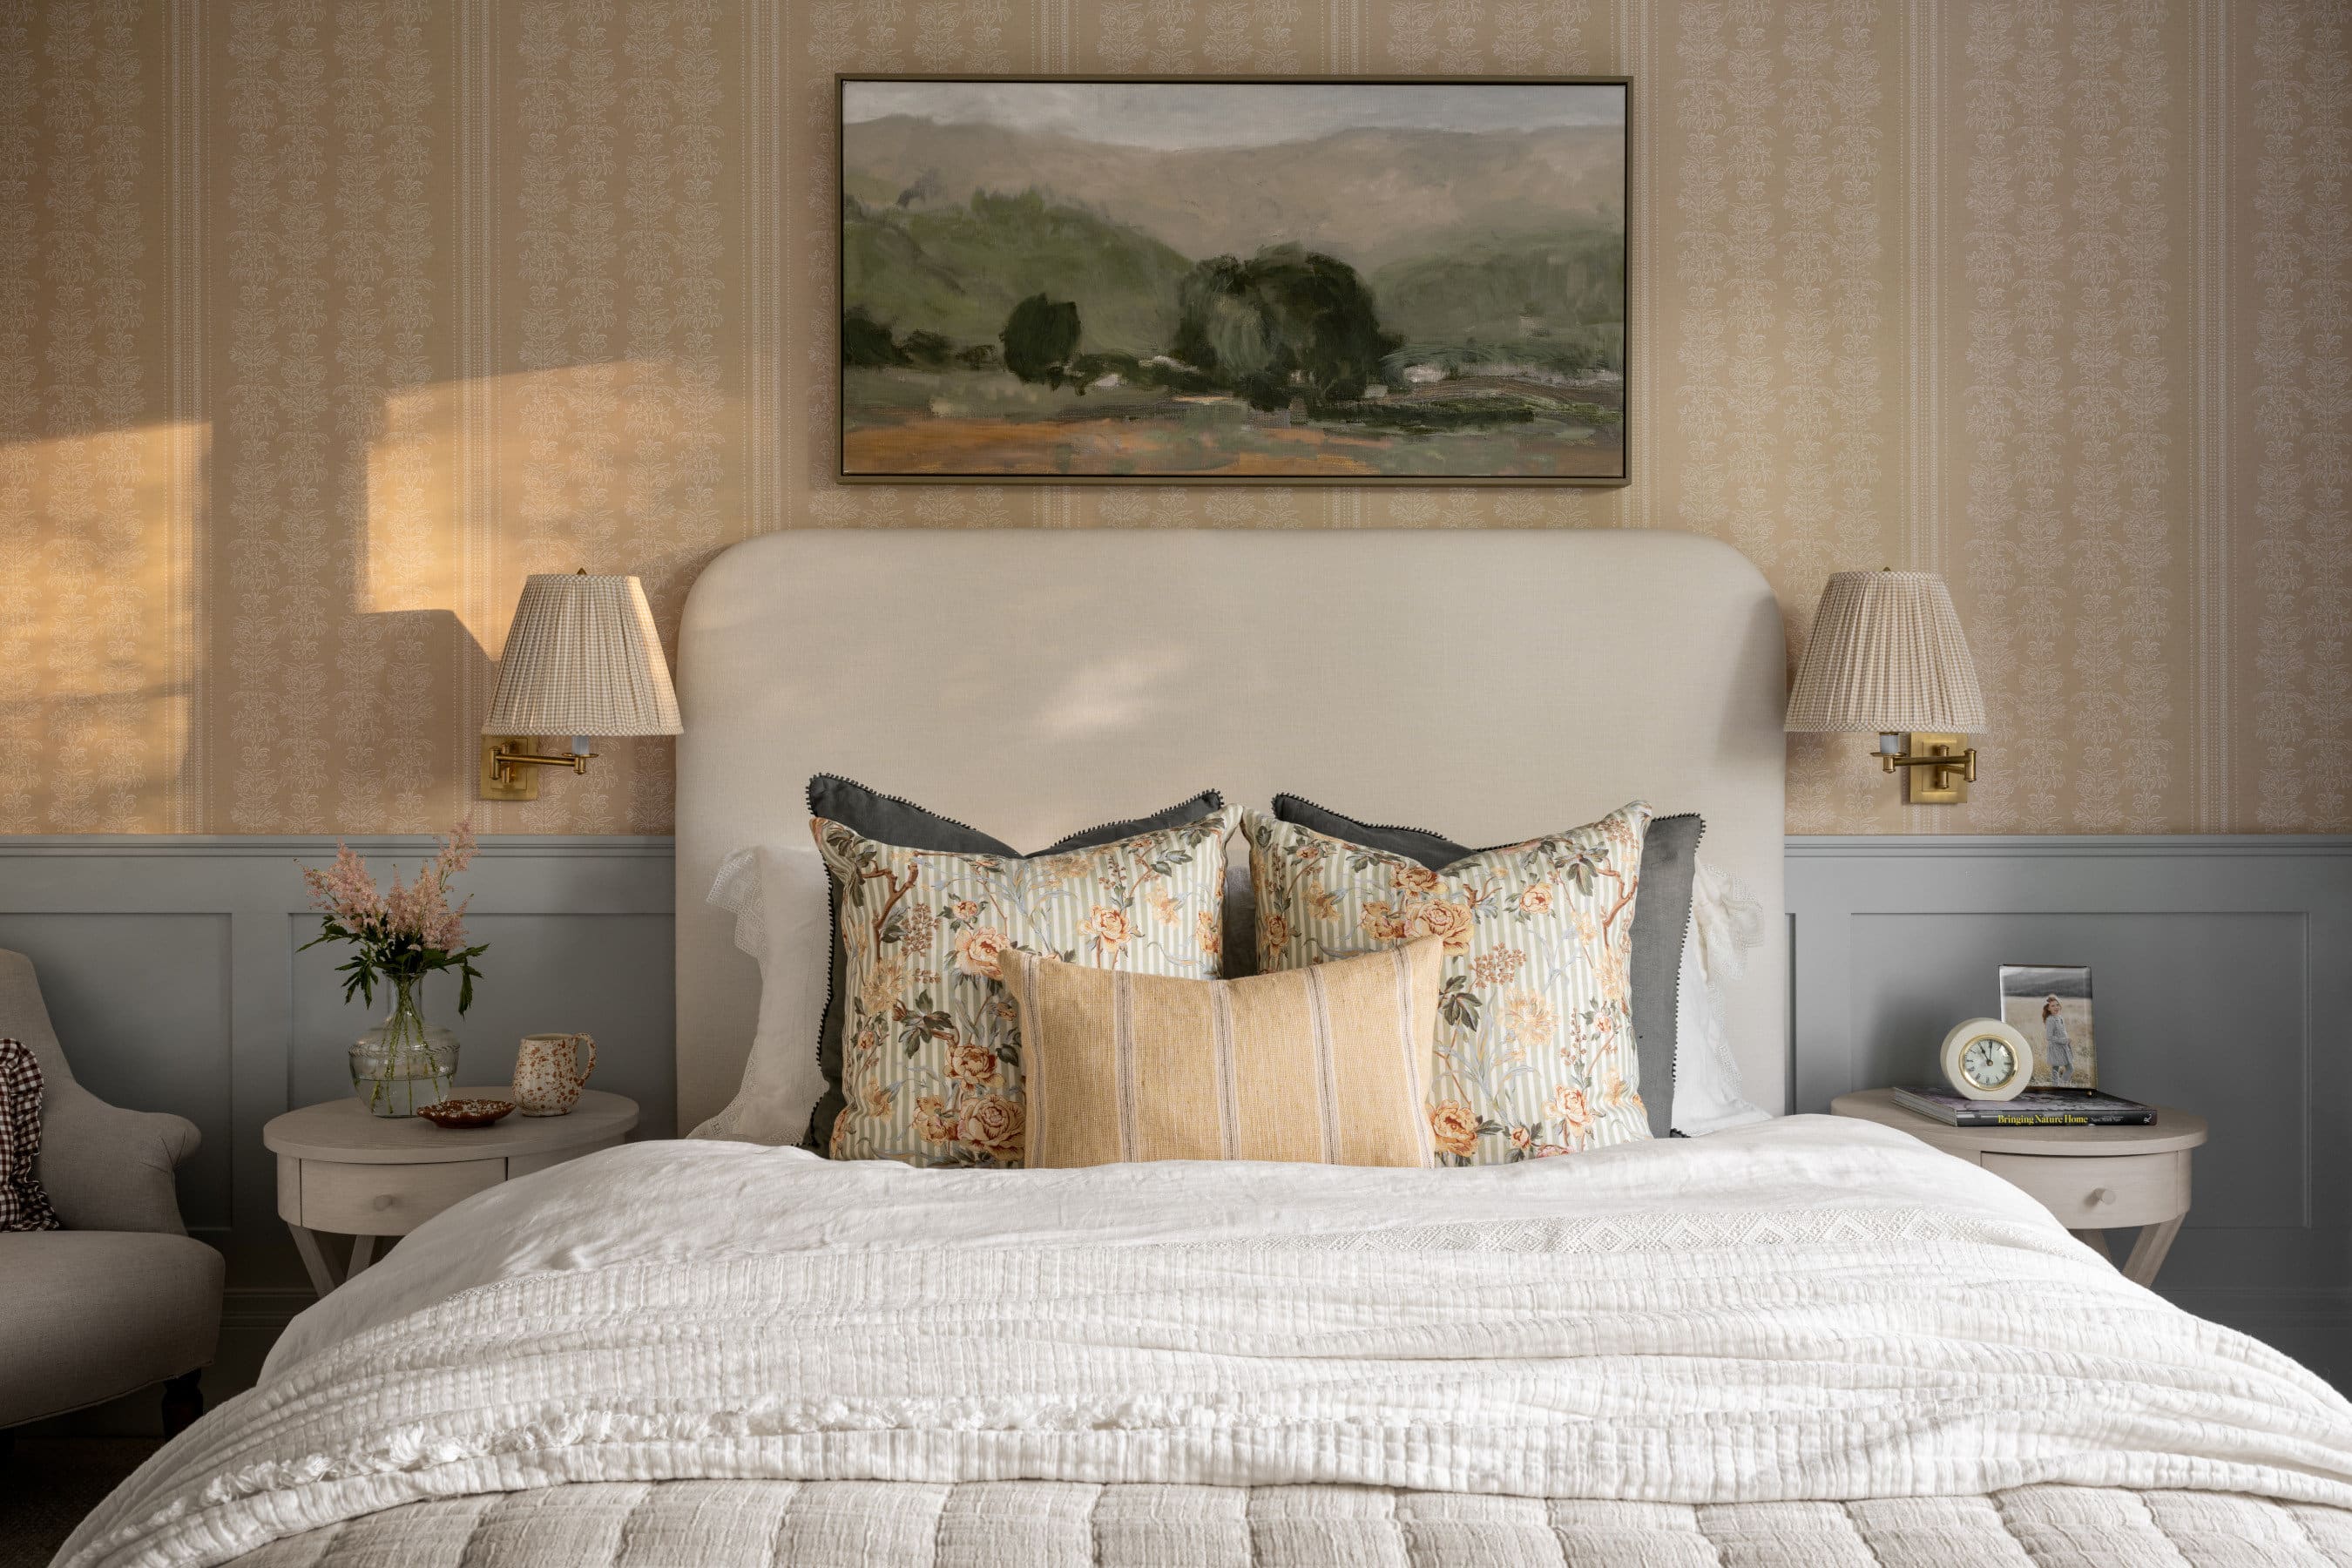
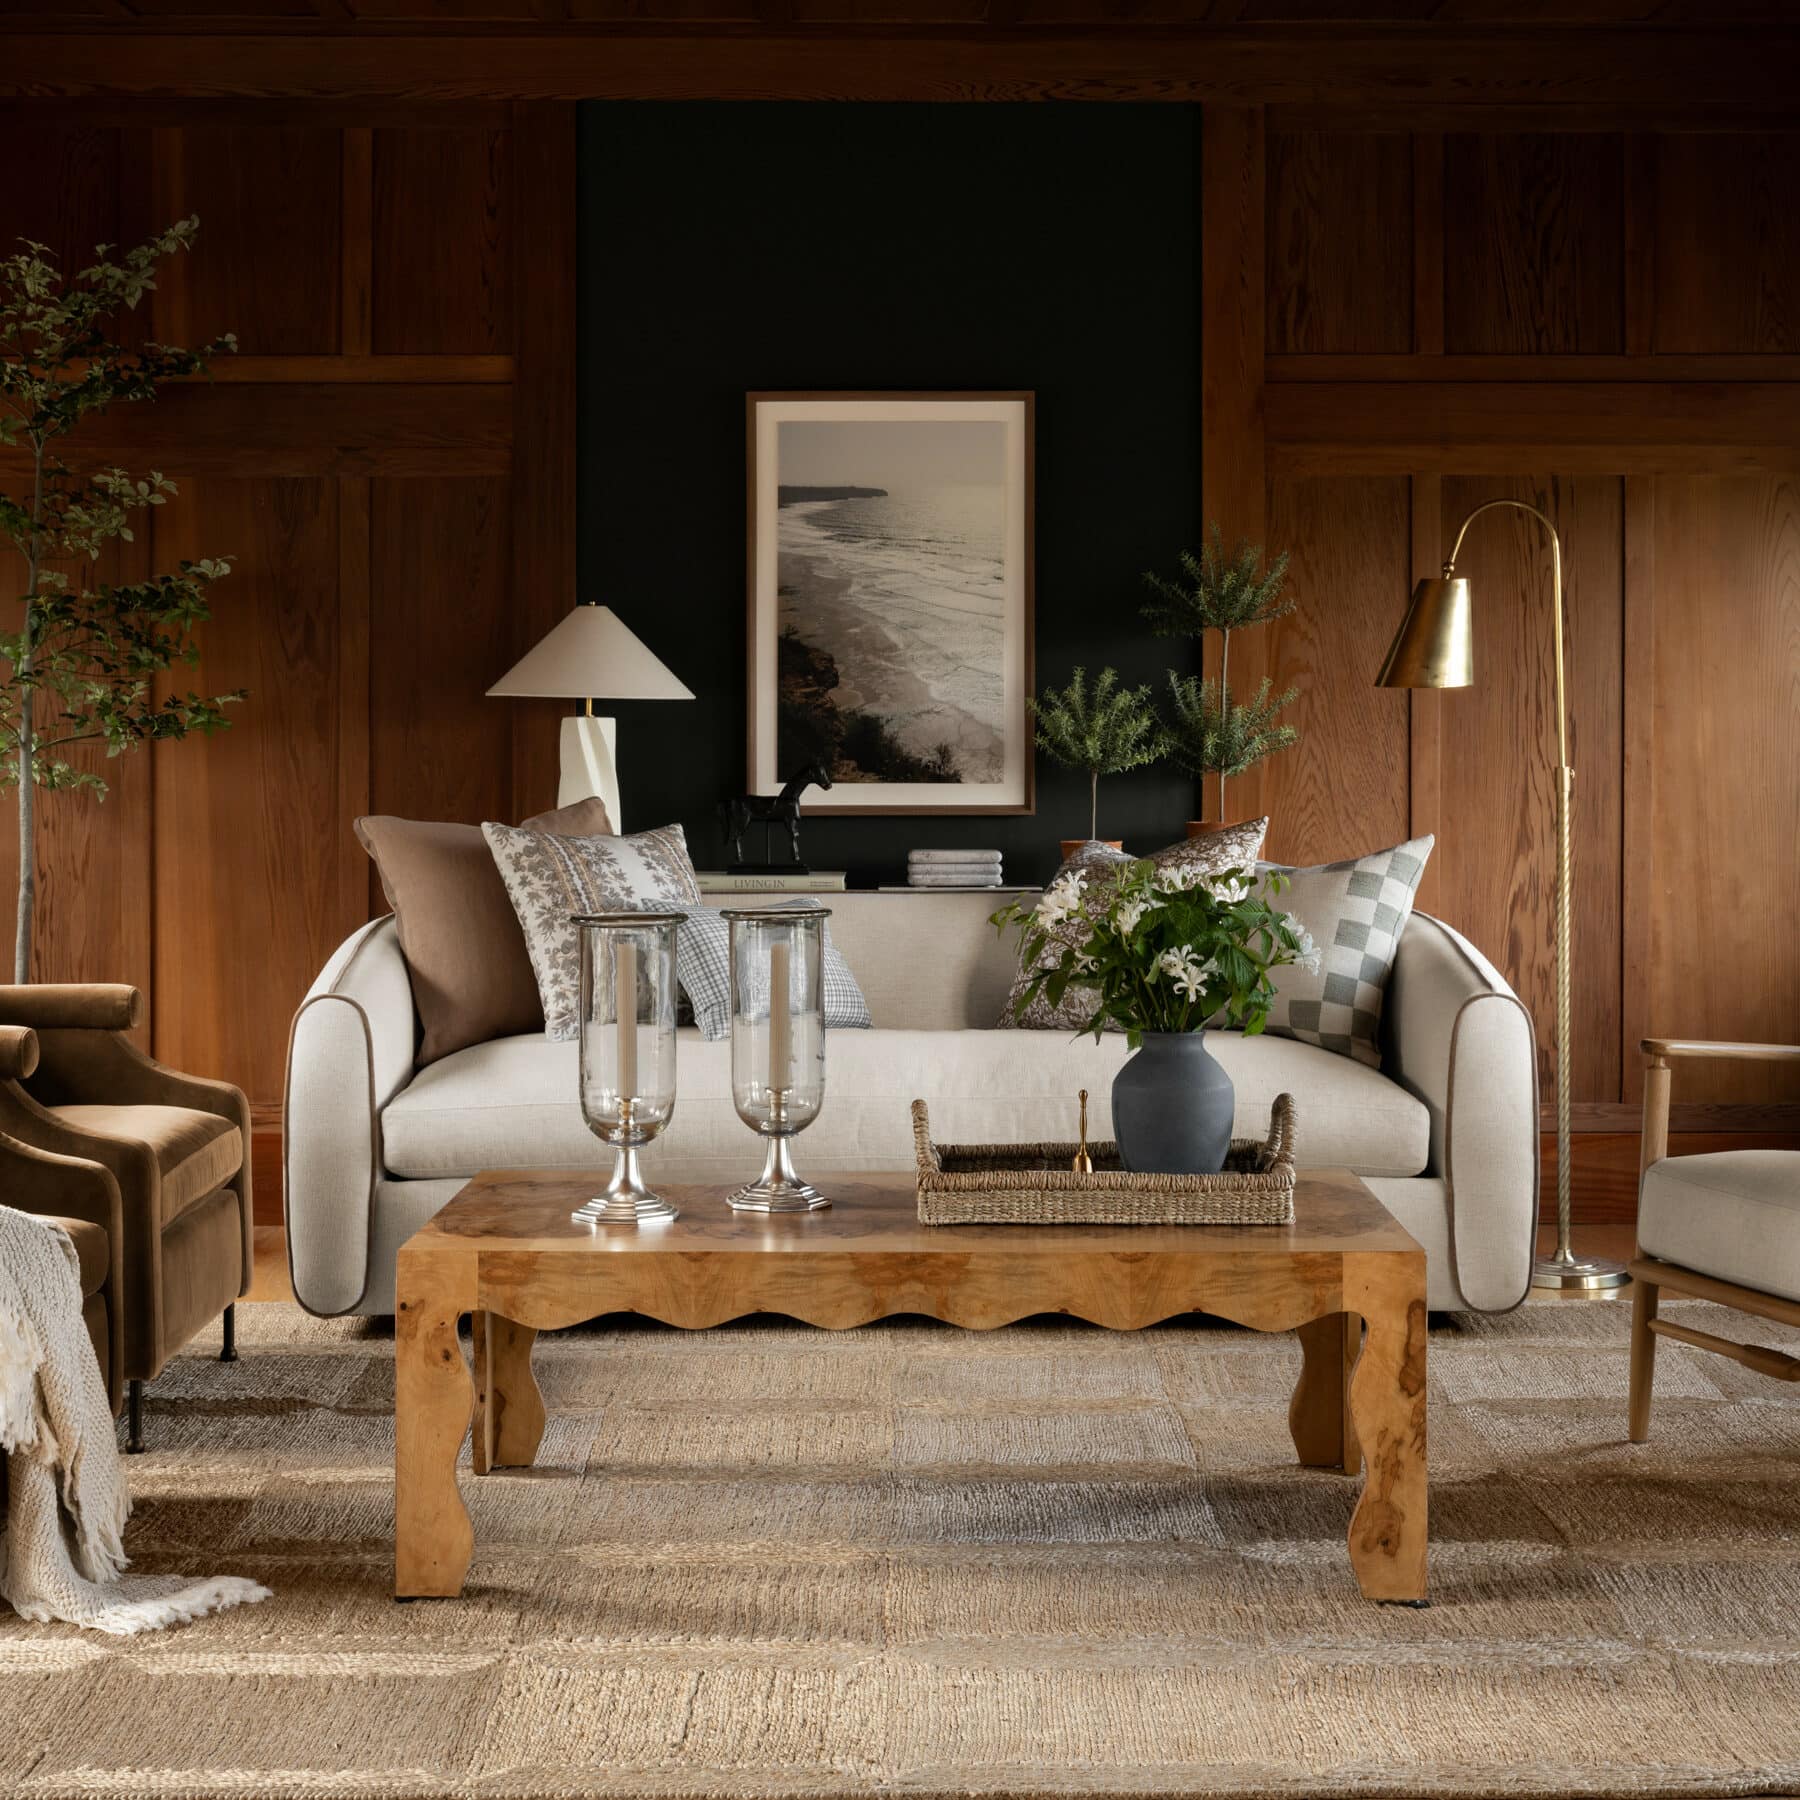
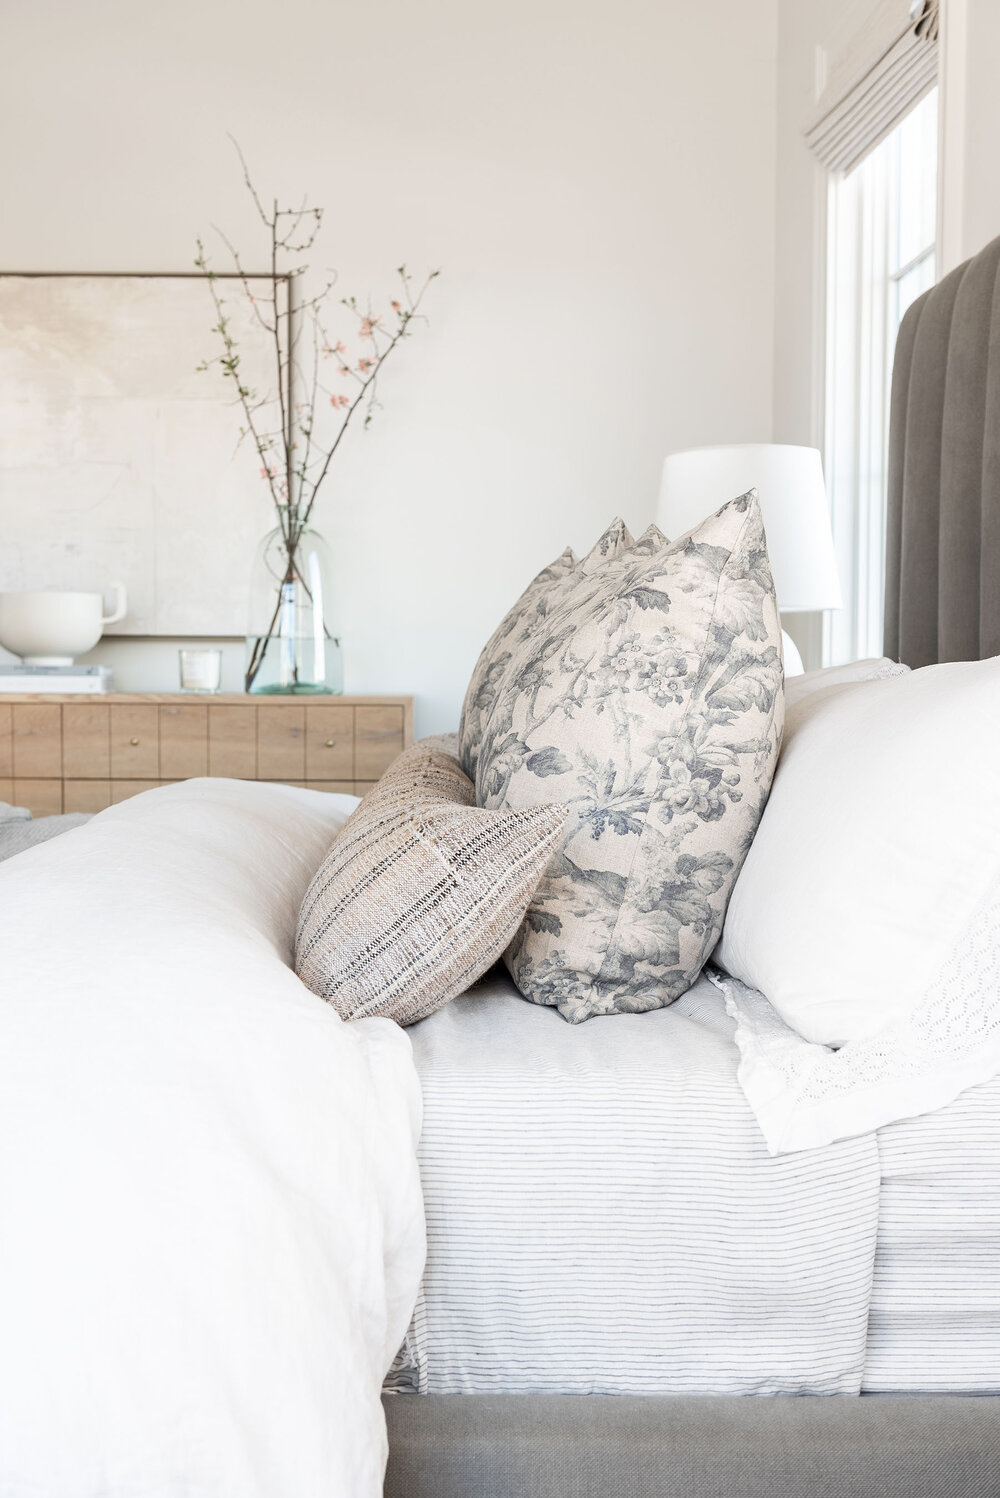
The bed
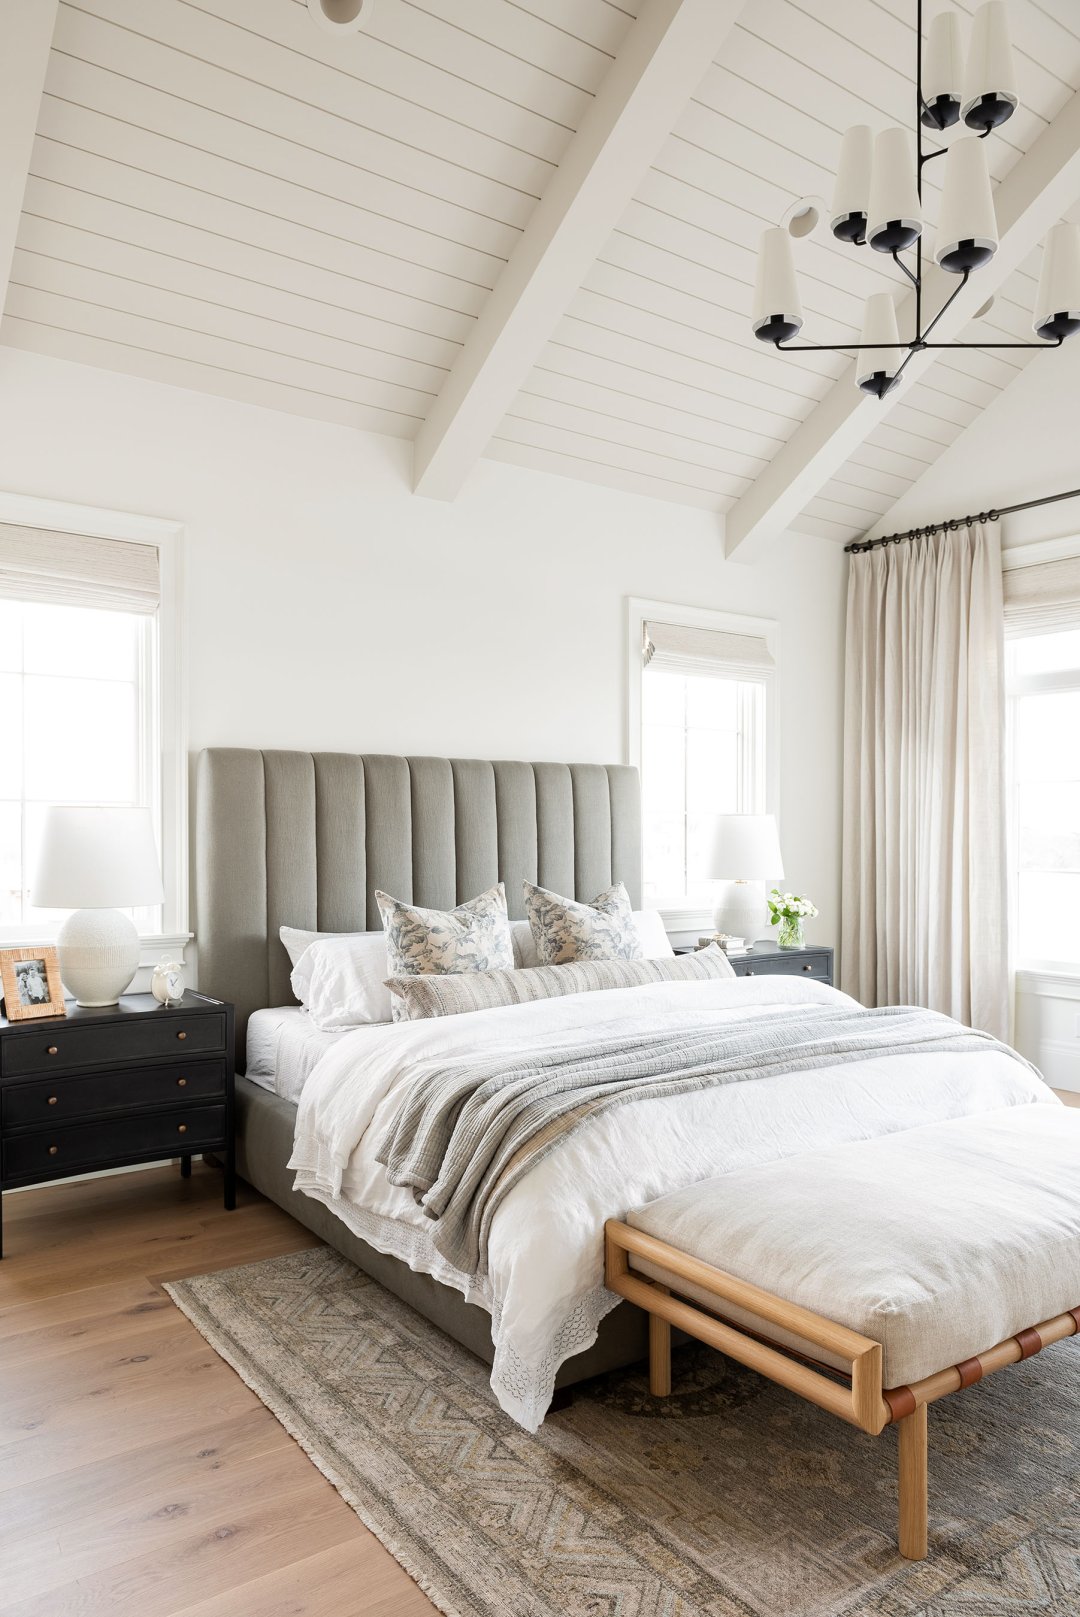
I love this channel back headboard from McGee and Co. because it blends masculine and feminine styles really well. I decided to go with this mossy green color, and it turned out so beautiful in here. I love that even though it’s a color, it’s not too bright. It felt a little risky to go for it, but I’m so glad we did because it set the tone for the entire room.
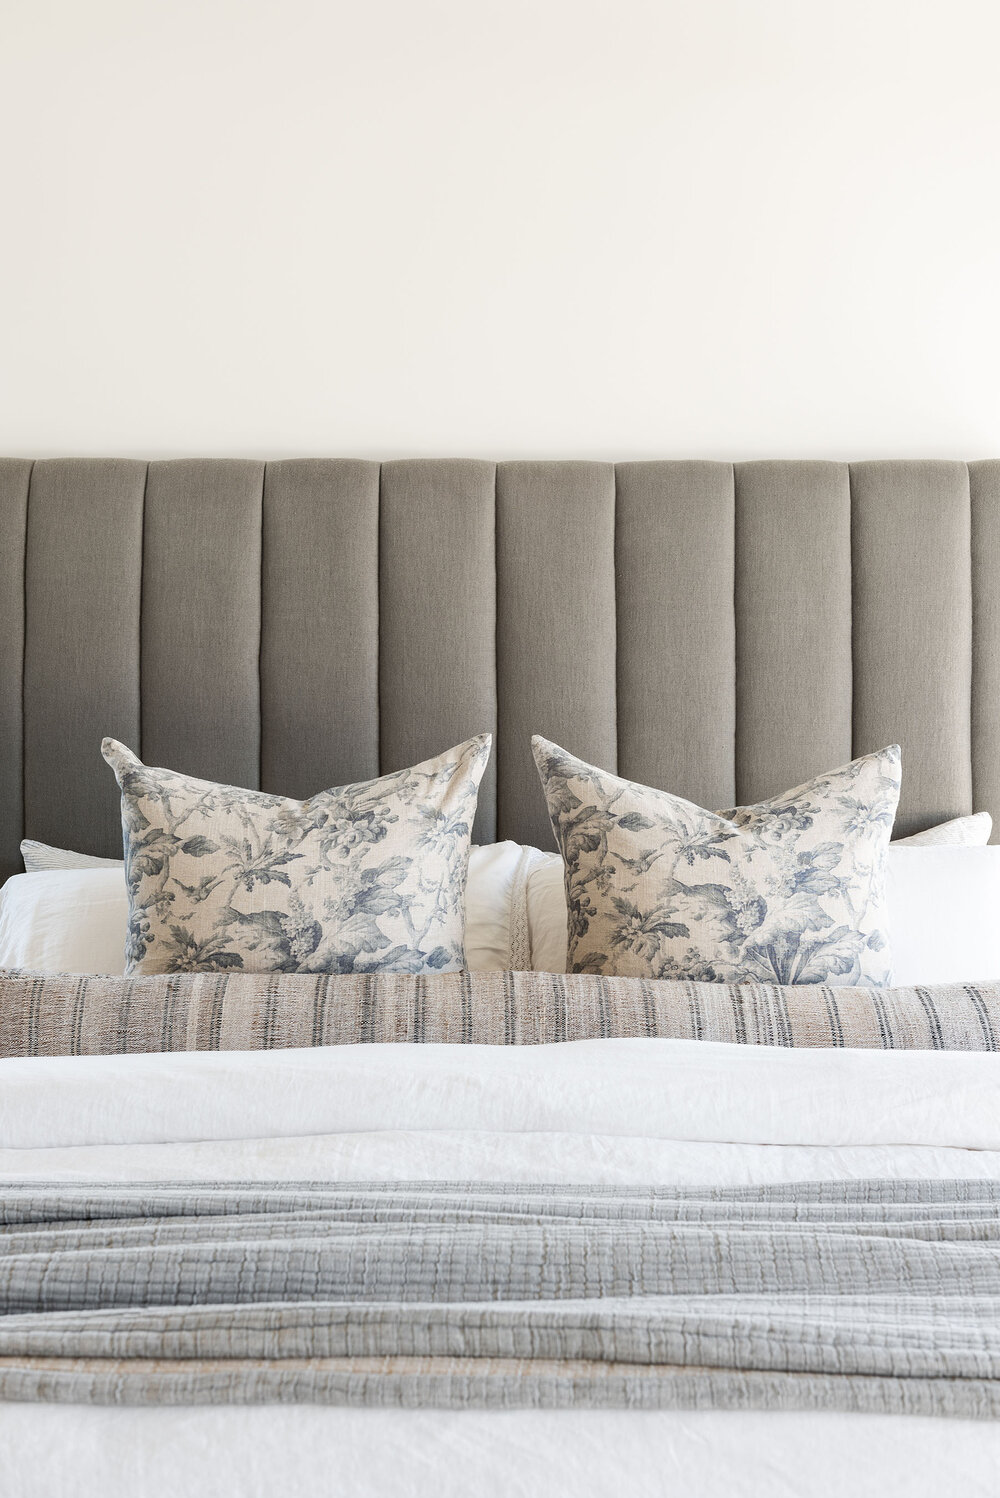
We tied it in with these floral pillows, and this lumbar we made. We had this vintage fabric sitting in our basement forever, and so I decided to use it to make the longest lumbar ever to finish off our bed. We used linens to layer, and then I love to put a throw at the end of the bed just in case you need extra warmth. Plus, it adds a great element of texture to make the space look that much cozier.
The McGee Home: Master Bedroom Photo Tour
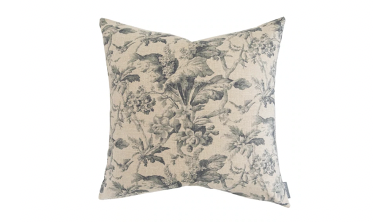
Flint Pillow Cover
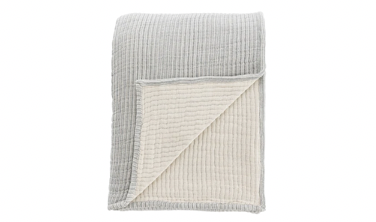
Hanson Striped Cotton Coverlet
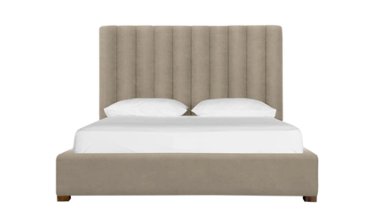
Hoffman Bed
The furniture
Our master bedroom had enough room that we could fit a bench at the end of our bed. We chose this Adamson bench from McGee & Co., with a huge down cushion and leather strap details. It’s not just a bench; it’s basically a daybed. It’s so comfortable, and our kids come in here and lay on it, it’s probably one of the most used pieces in our home.

We wanted to tie in the wood tones from the bench with our dresser that just launched on McGee & Co. I love the knobs on this piece because they add a different element that feels pretty and almost feminine.
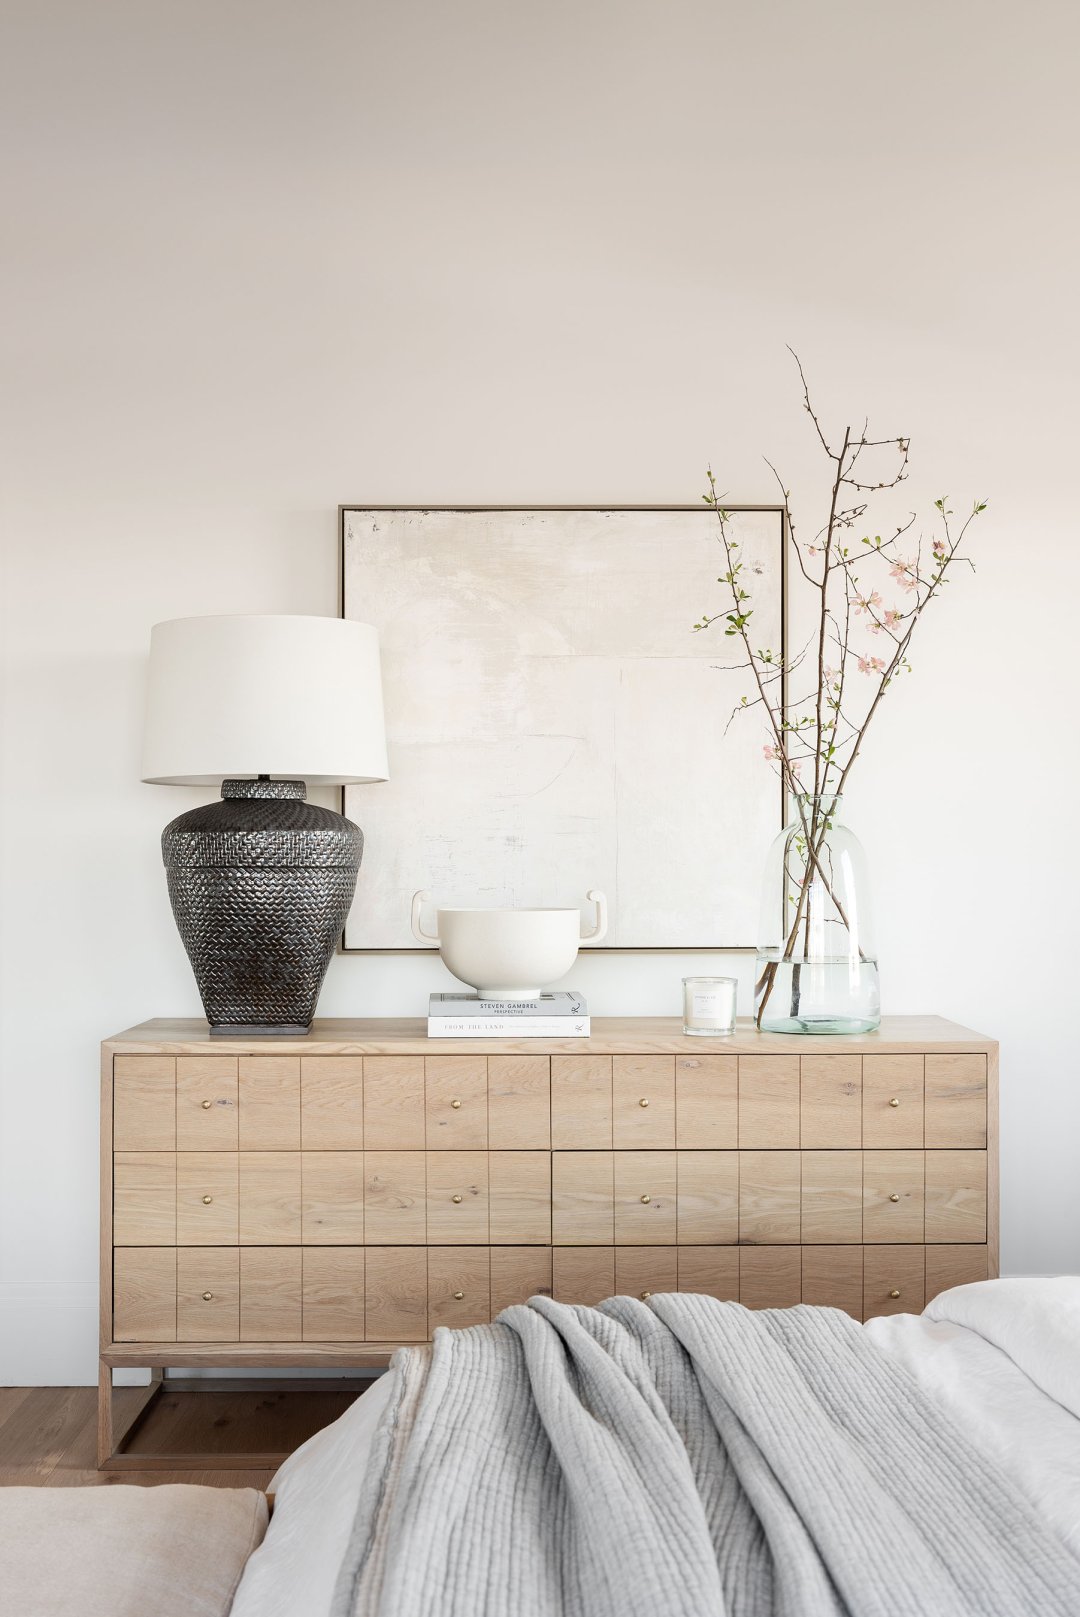
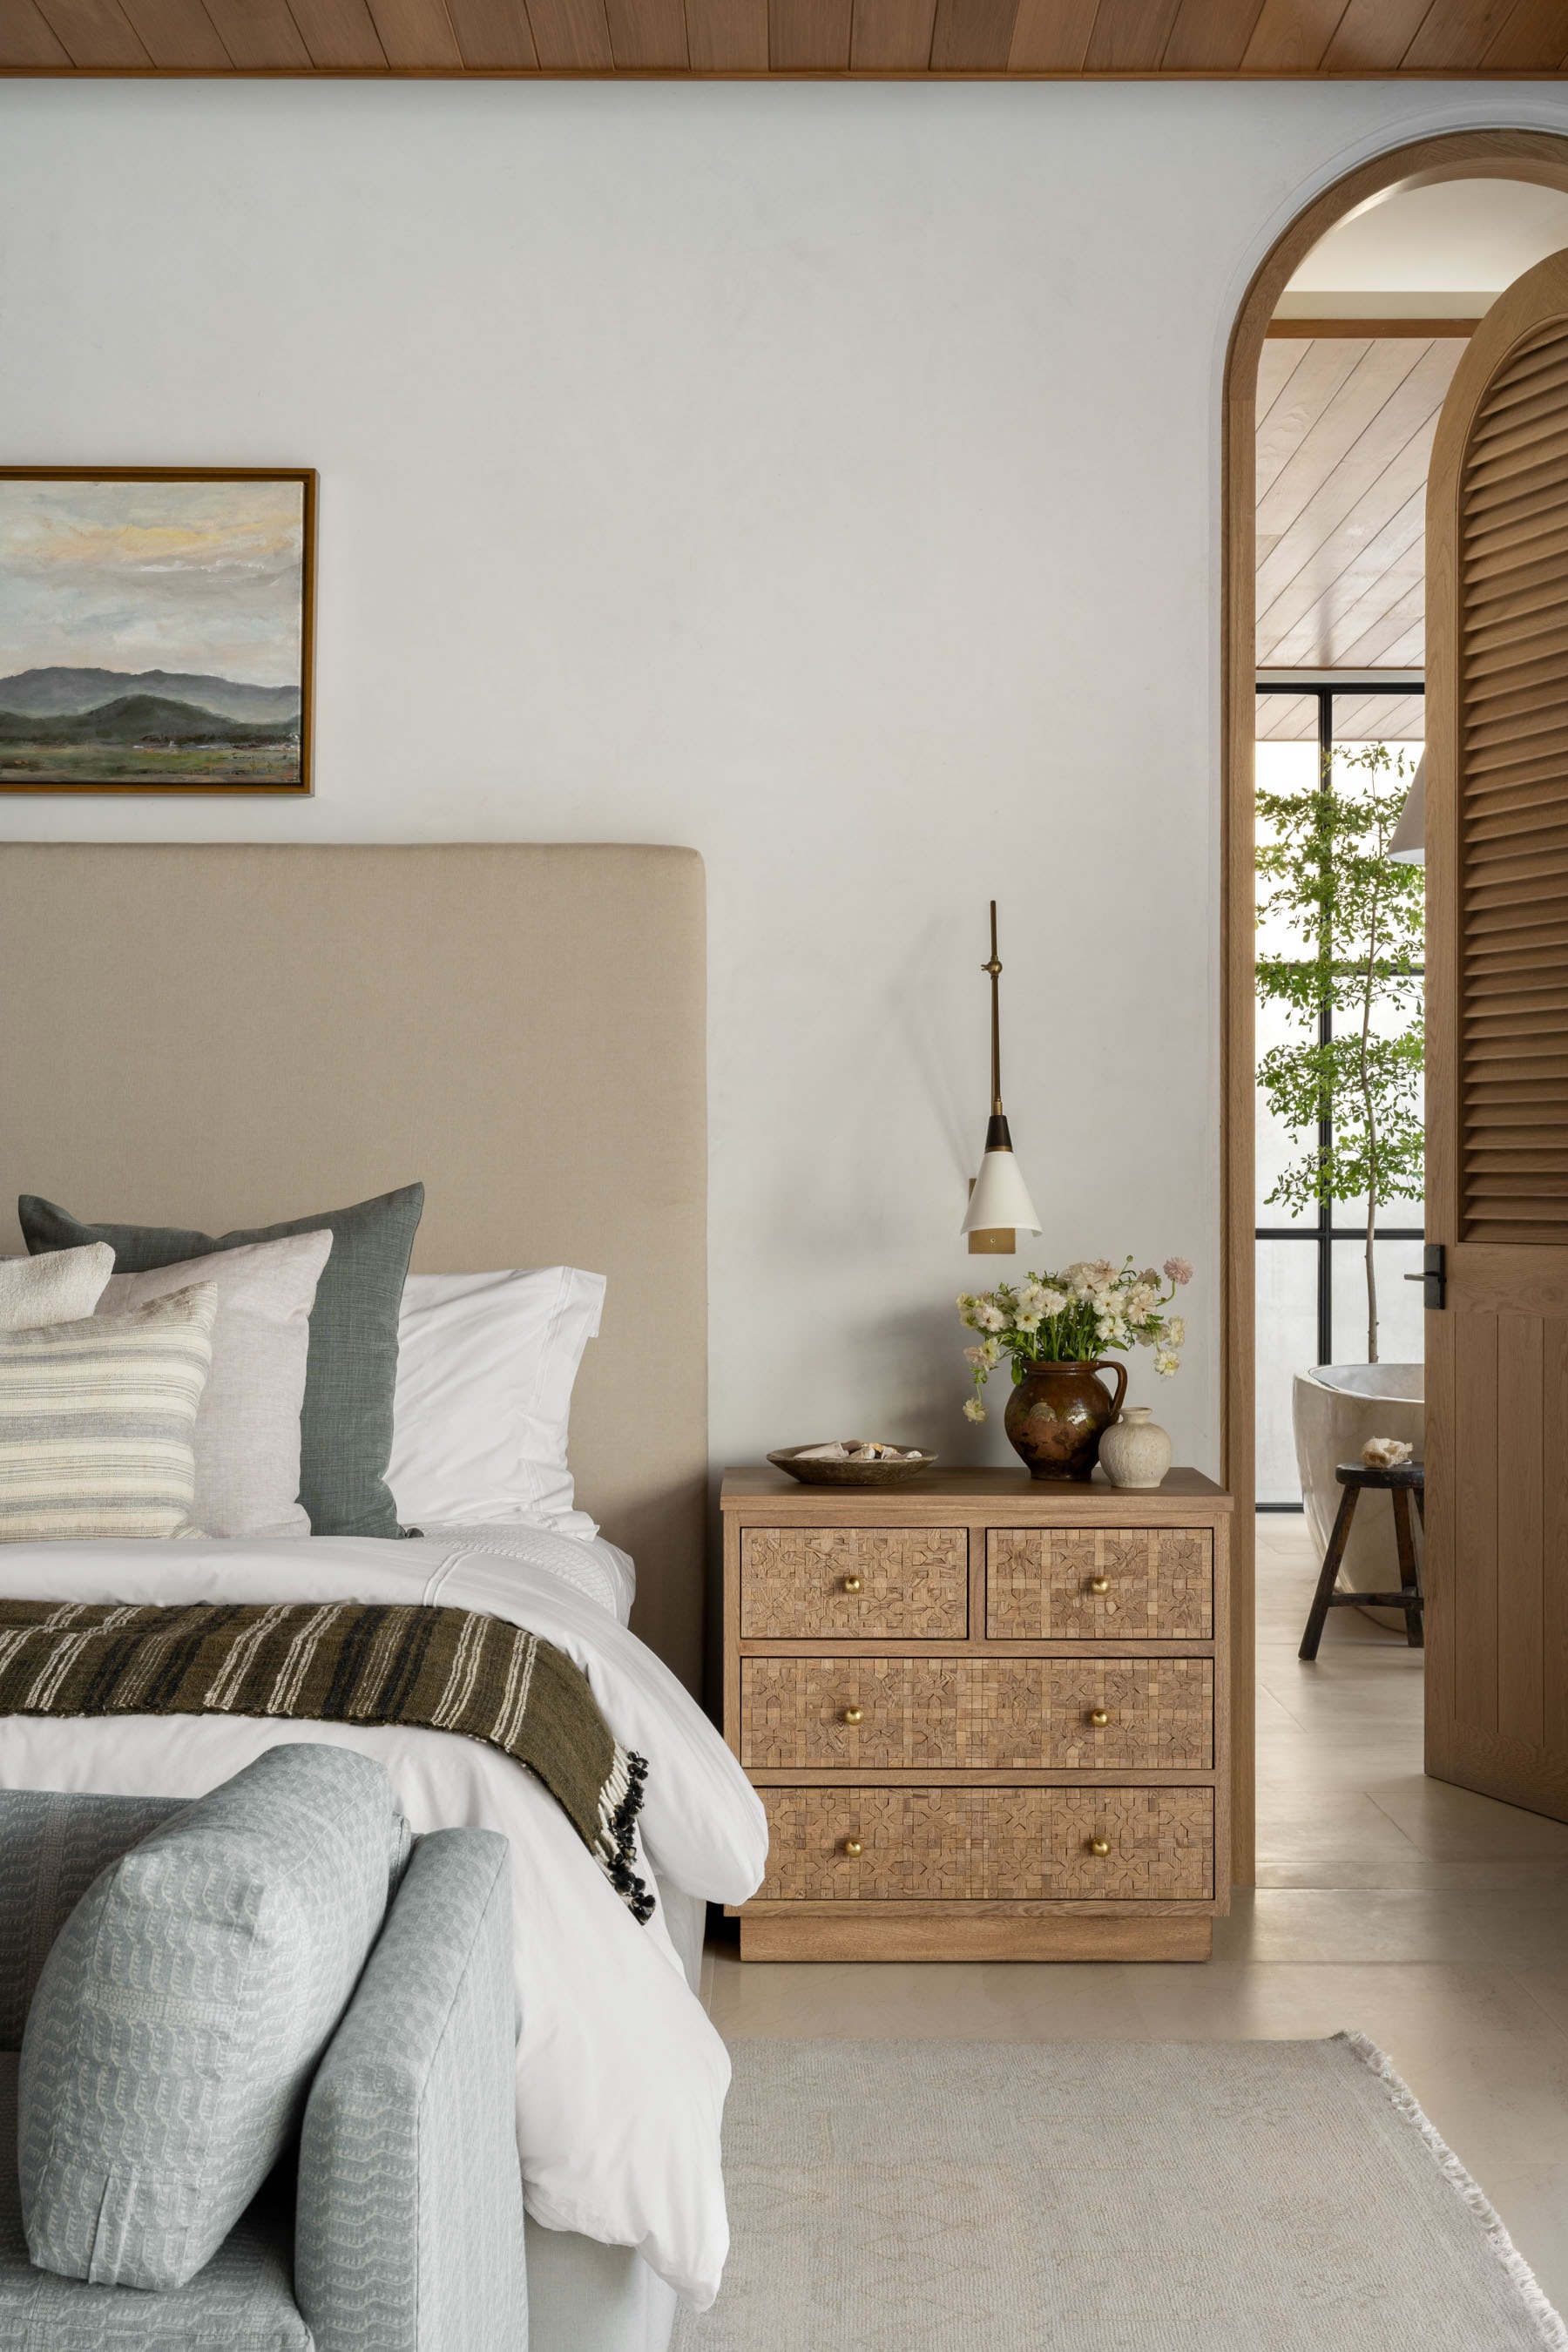
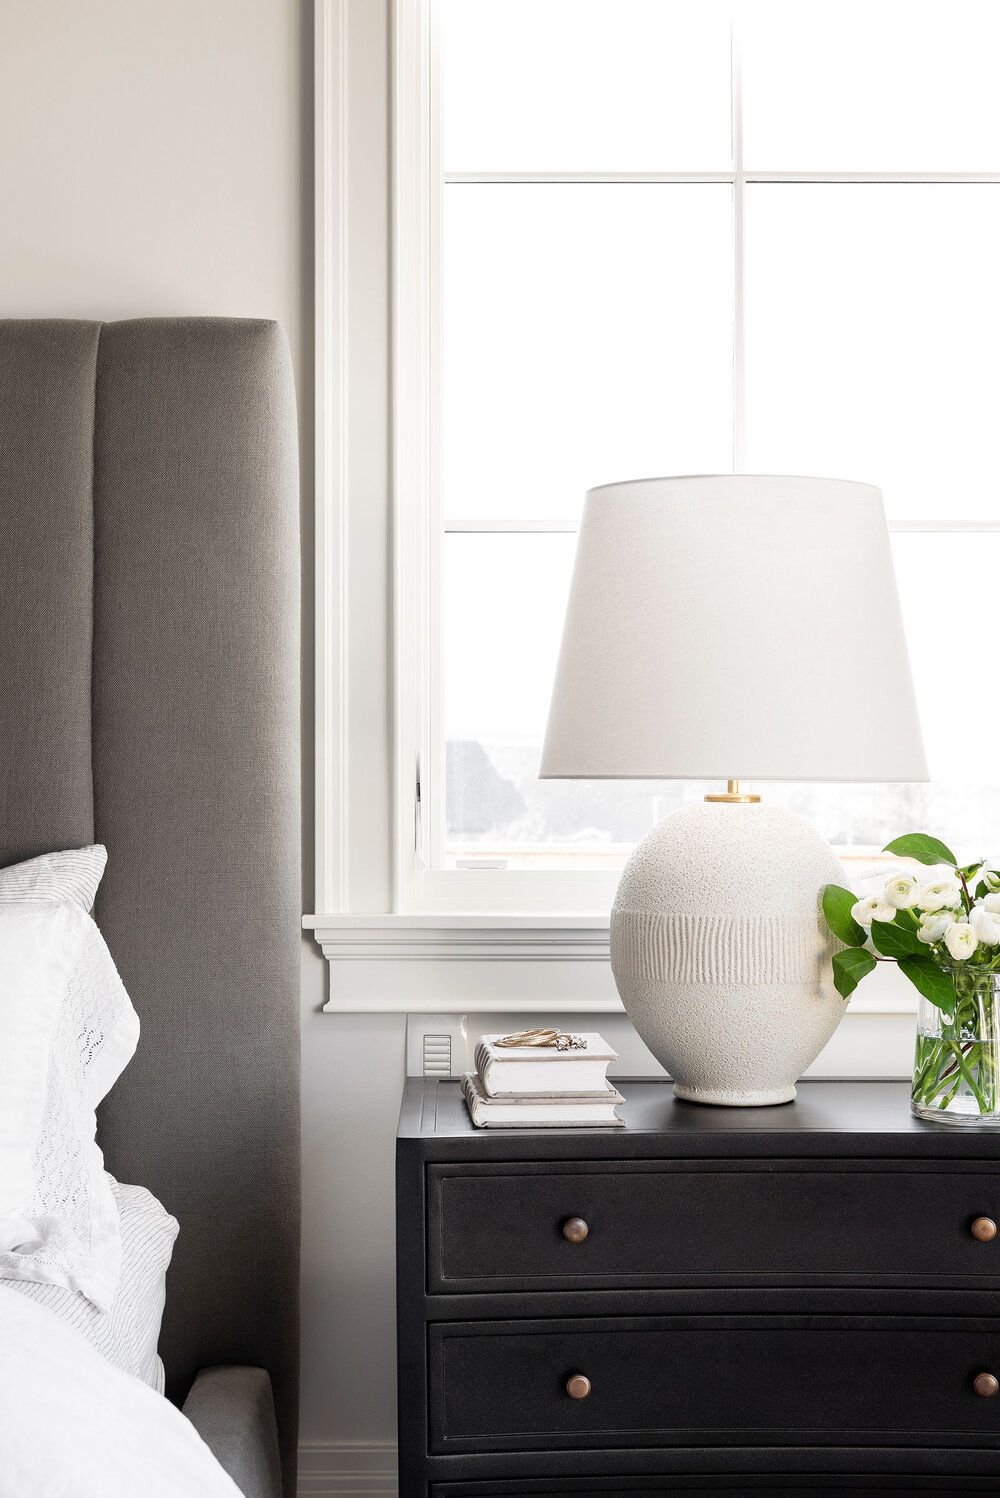
Next, we wanted to break up some of the wood grain we had, so we went with these steel nightstands from McGee & Co.
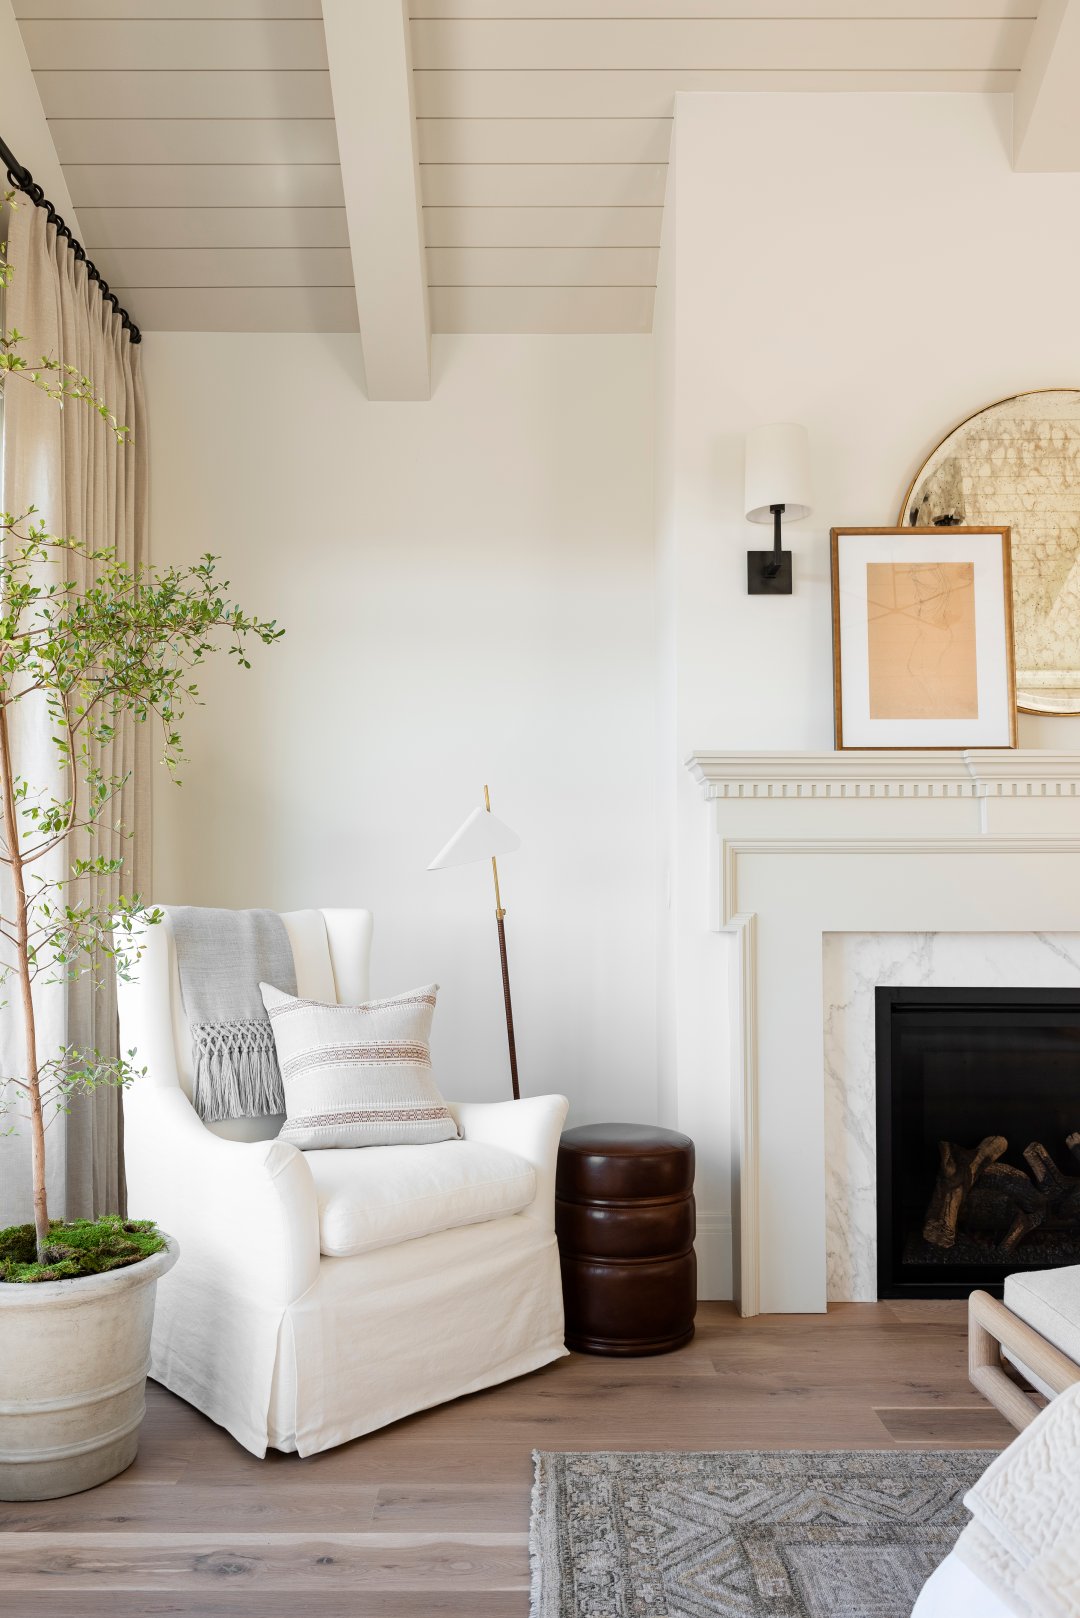
If you’re designing a master bedroom and the space plan is large enough to incorporate a chair, I love to do what we call “a chair moment,” in the corner. This chair is really beautiful, it has this nice swing back, it swivels and it’s so comfortable.
The McGee Home: Master Bedroom Photo Tour
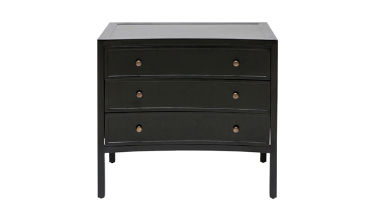
Pierre Double Nightstand
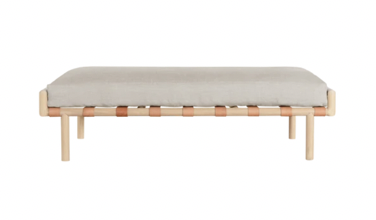
Adamson Bench
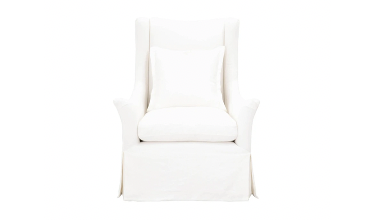
Silana Swivel Chair

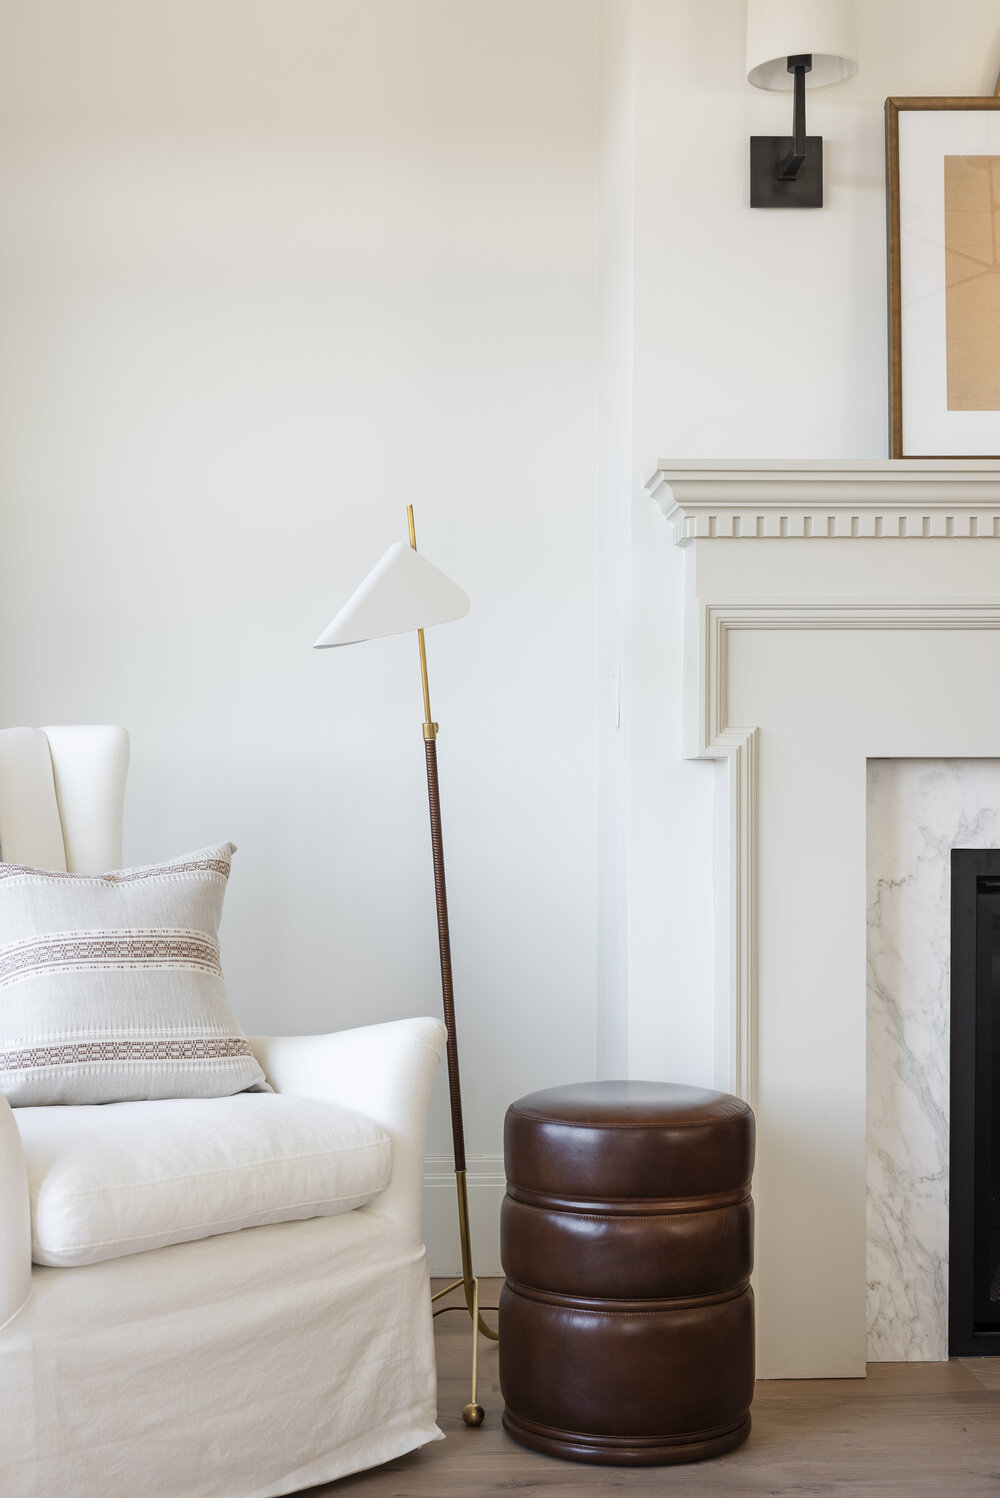
Beck Leather Stool

Huxton Dresser
The details
To complete our “chair moment,” we placed a side table ottoman next to it to incorporate some added texture and function here, and added a modern standing floor lamp to set off the curves on the chair.
Every space is different, but we typically use an 8×10 rug in most master bedrooms. We did this kind of olive green grey rug from McGee & Co., and it was the perfect way to tie all of the tones and hues together.

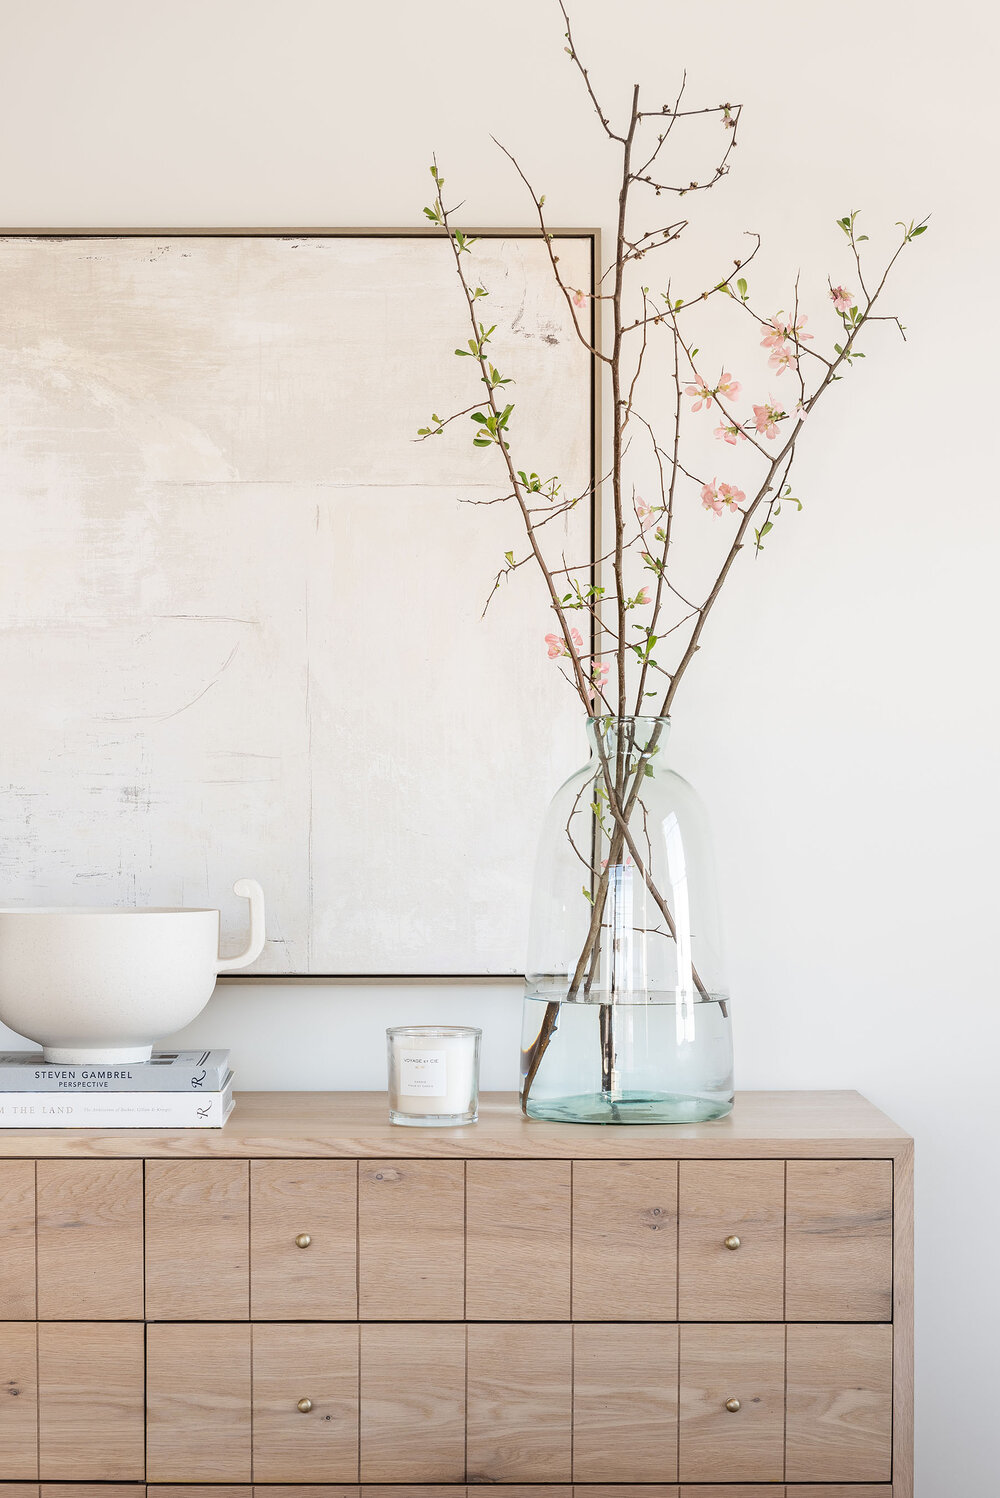
On the dresser, we styled an old artwork piece from McGee and Co. and layered in some of our favorite accessories.
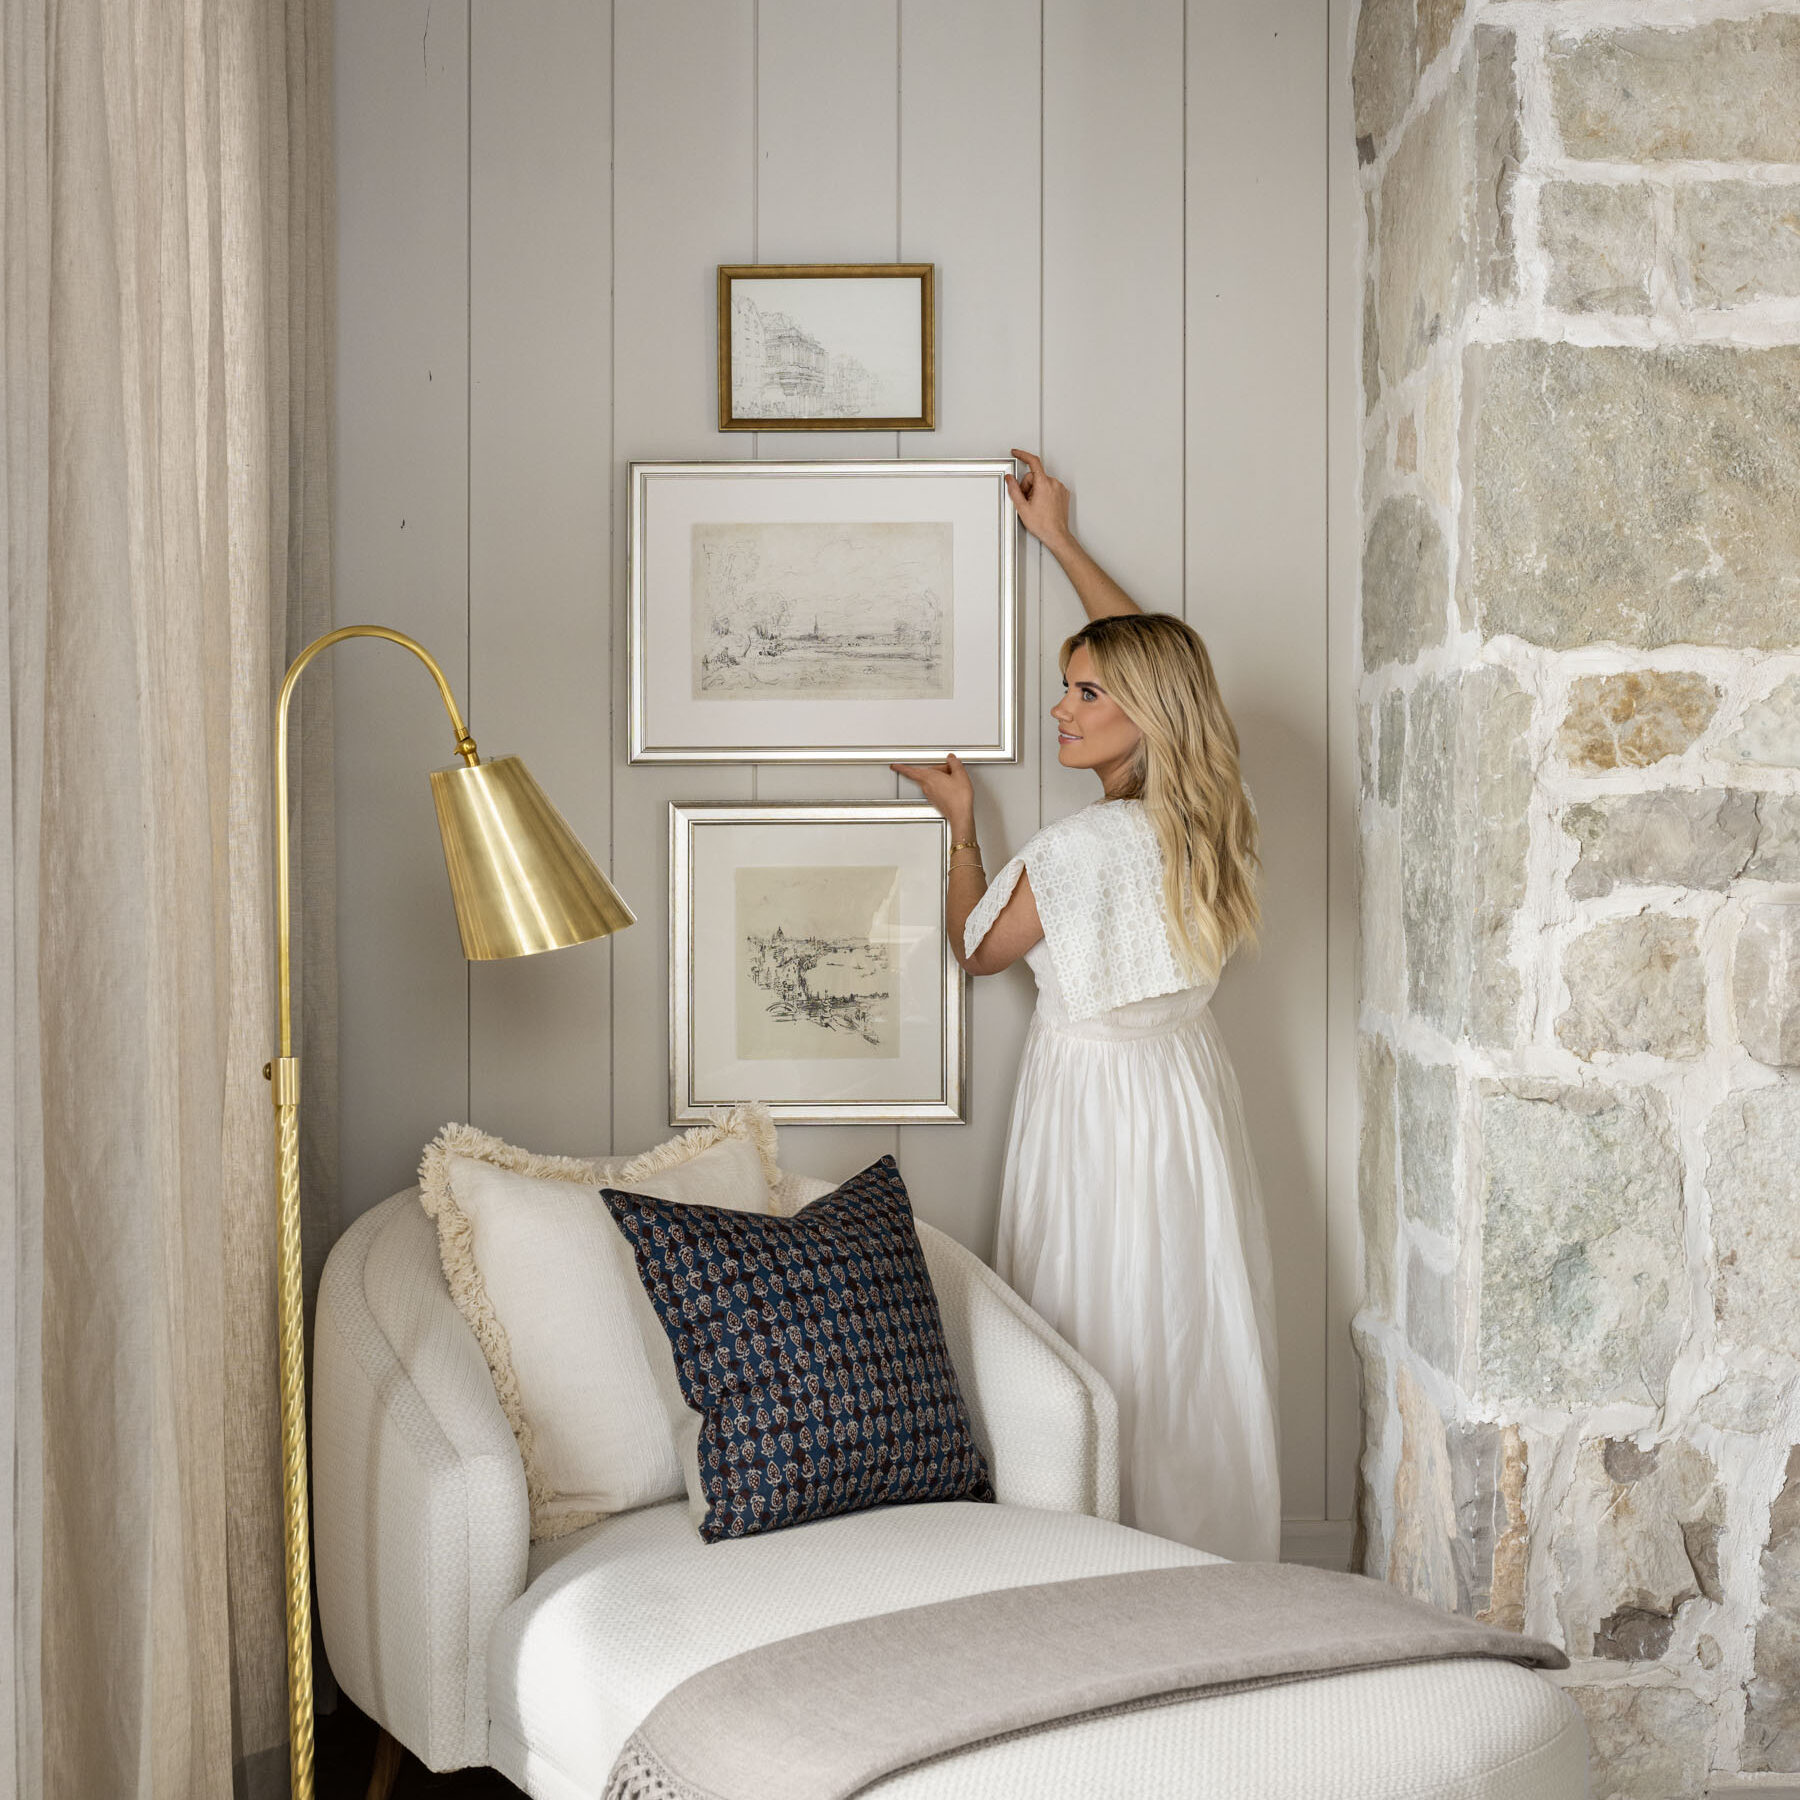
If you have wall space after you’ve placed your bed and dresser and nightstands, I always suggest doing a tall leaning mirror. Not only is it a great spot to get ready, but it bounces the light really well and makes the room look larger as a result.
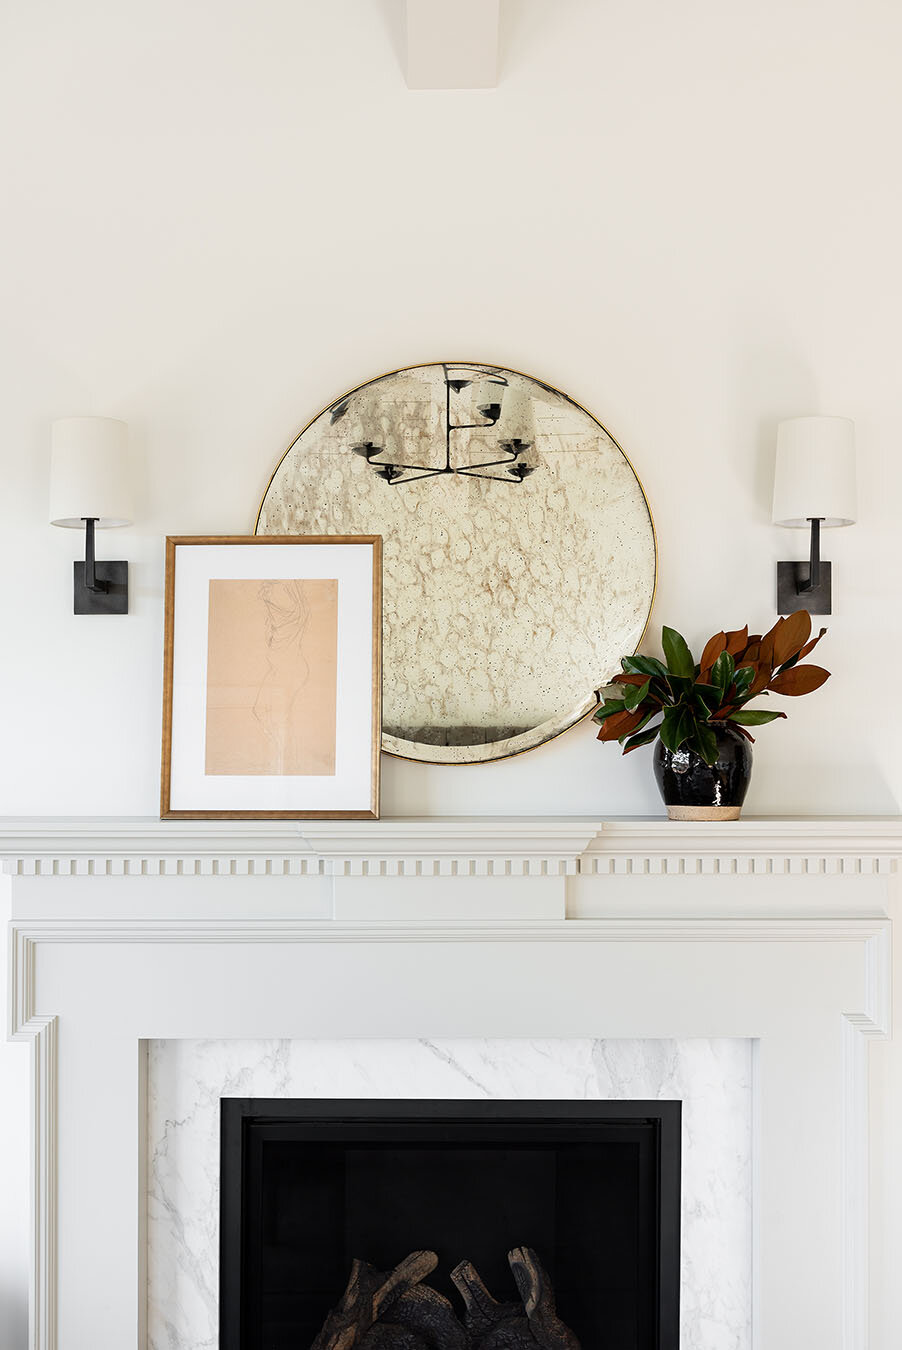
After we placed the leaning mirror and artwork over our dresser, I wasn’t exactly sure what to put over our mantle. I played with a couple of different options and decided to go with this antiqued mirror. I love that it has an antique effect so it can live on the same wall as the standing mirror without competing with the finish and looking too one-note. Then, we layered one of my favorite sketched art pieces, added some collected decor items and finished it off with sconces from McGee and Co.
The McGee Home: Master Bedroom Photo Tour

Sketched Figure
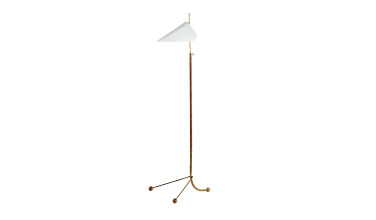
Moresby Floor Lamp
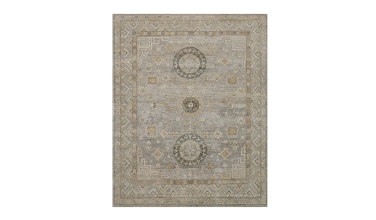
Meridian Hand-Knotted Rug
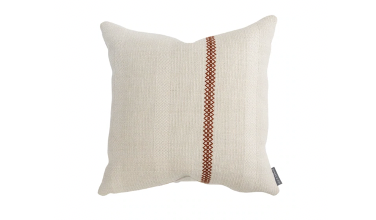
Willy Pillow Cover
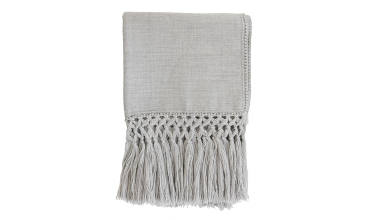
Fringed Alpaca Throw

Ojai Single Sconce
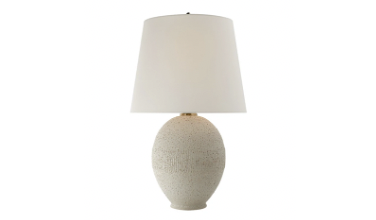
Toulon Table Lamp
Thanks for following along on The McGee Home journey! If you missed our webisode yesterday, you can watch it below to get a virtual tour. Be sure to check back in next week for more of The McGee Home. Next up: The Master Bathroom!

You May Also Like